I went to India for 3 weeks to mostly visit family although we did a couple of days of sightseeing also. More on the sightseeing later.
First of all, the scarves and towels I made were received very favorably. I was surprised to some extent because knitted gifts were received well by some but not with this level of enthusiasm. I think it is due to the fact that there is limited use for knitted items in hot Chennai.
I generally just visit when I go to India. I don't have a long shopping list any more. I used to, because everything was not available here. But now I can get most things here. I wanted to buy some stretchy sari blouses, a never-ending quest. I want colors I can wear with my classic Kanchipuram silk saris so I want the traditional colors. Well, they never have them. They have more 'exotic' colors. That is great when I want to match a new sari but not so great when I want ones that will go with a variety of the saris I already own. So each time I buy one or two that I think will match. This time I got a dark blue. I bought an orange to match a new sari and a few for my sister.
I also used to buy a Christmas gift for my hair stylist. She is more of a friend than a hair stylist as I have been going there for more than 30 years. But these days, I make her a gift so there is no need to buy. I buy a gift for her when I travel outside India but I've already bought her a lot of the things that I think are nice gifts from India.
This time I had cotton punis on my shopping list as a major item. I spent a whole morning googling and calling stores where I thought they would have them. No one in Chennai had them or even seemed to know what they were. Then a Ravelry friend from Kolkata told me she got them from a local seller who travels to Wardha in the state of Maharashtra to buy them. The Gandhi Sevagram Ashram there makes and sells them. But there is no online shop. However, she generously sent me some by courier. What a lovely gift!
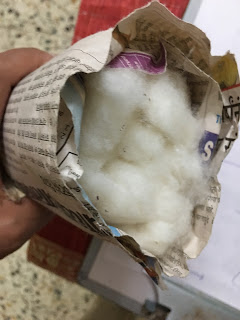 They come in 100 g bundles wrapped in newspaper.
After my return, I started spinning cotton on my new-to-me Bosworth charkha. I bought this last summer from another Raveler. She included some easy-to-spin colored cotton sliver so I started with that. That is my first new skill. It is interesting. I have thread that varies from very fine to not-so-fine and I need to decide what degree I want and then produce it consistently. I've spun 1 spindle full.


I also started working on the Navajo rug I started in the class at Rhinebeck. Navajo weaving is very different from tapestry weaving, which it resembles. The technique interlaces the weft threads every other row so the rug is nice and tightly woven. This took me a bit of time to master. Fortunately, I had video taped the instructor when she demonstrated key techniques. Going back and watching that, trying it out, watching again, watching other Navajo weavers weave, etc. finally made it click. I am doing pretty well given I am designing on the fly as the Navajos do. It means I have to backtrack some times and of course, I have to unweave when I make a mistake - for example, I didn't cover a warp thread for 2-3 rows and had to go back.

I have finished the design of the blocks and done a stripe to delineate it from the next design. I am not making this symmetric as I don't want to have to manage the height of each piece. The warp has to be completely woven and it is tightly packed in. I am just going to do another pattern on the other side and end with stripes.
There are two sheds. The top heddle is the dowel on the top that is threaded through every other warp thread. Then there is the pull heddle that is hanging below it. On every pick, you thread something through one of the two sheds and then that holds the shed open to do the weave. I was using a pick up stick but now that is too wide so I am using a fat knitting needle. I will go down to a smaller one in a bit and then eventually one has to remove both dowels and weave using a needle. I am beating with a metal hair pick, some dog combs, and occasionally I put the pickups stick in and press down with it to make sure I have a horizontal edge.
On the non-new skill area, I knitted a hat and undid and reknit it when I was in India. I wanted to make a pair of fingerless mitts to match but I ran out of yarn. I undid the hat and ripped out an inch worth of yarn and reknit the crown. But that still wasn't enough for the thumbs. I found some red yarn, slightly thicker, and I will finish the mitts with that.

Before I cut an inch off the length.

After the re-knitting.
I also started another pair of fingerless mitts. They are still in progress and I don't have a photo.
I plied the red yarn I spun before I left. This was the last of my Tour de Fleece projects from last year. I am very happy with the yarn. That is the bobbin of plied yarn on top. I am now spinning the gradient on the bottom. I will weave a shawl with the two together after spinning. I have 560 yds of the solid red - it was 8 oz of fiber. I have 8 oz of gradient. Right now I am thinking of the solid red for the warp and the gradient for the weft. I'll spin each gradient braid separately and ply them together.

As you remember, the solid red was actually spun by holding a cool red and a warm red together. I am quite pleased at the result. It has a lot of liveliness in color and the yarn is very bouncy. One braid was Polwarth/silk and the other was superwash merino/alpaca/nylon/Tussah. I was afraid about how it would react when I finished it. I was gentle and I will be gentle when I finish the weaving. I don't want differential shrinkage where the non-superwash wool shrinks and the rest doesn't. The gradients are merino/silk so will behave like the Polwarth/silk. Note to Self: read the fiber content before you put fibers together.
I also received some lovely cotton yarn for weaving from another Raveler friend in Chennai.

There are about 250 g of each color so 1 kg in total (2.2 lbs)
She and I went to Shuttles and Needles in Chennai, which is a fabulous store. They are dealers for Ashford and Saori and have looms set up to weave and spinning wheels and spindles as well as knitting supplies. I spun a little on one of the Ashford spindles when I was there and bought one with some fiber for my sister-in-law who was fascinated by both my weaving and my search for punis. Unfortunately, I only went there two days before I left so she had 1 day worth of teaching. Now we are trying it using WhatsApp.
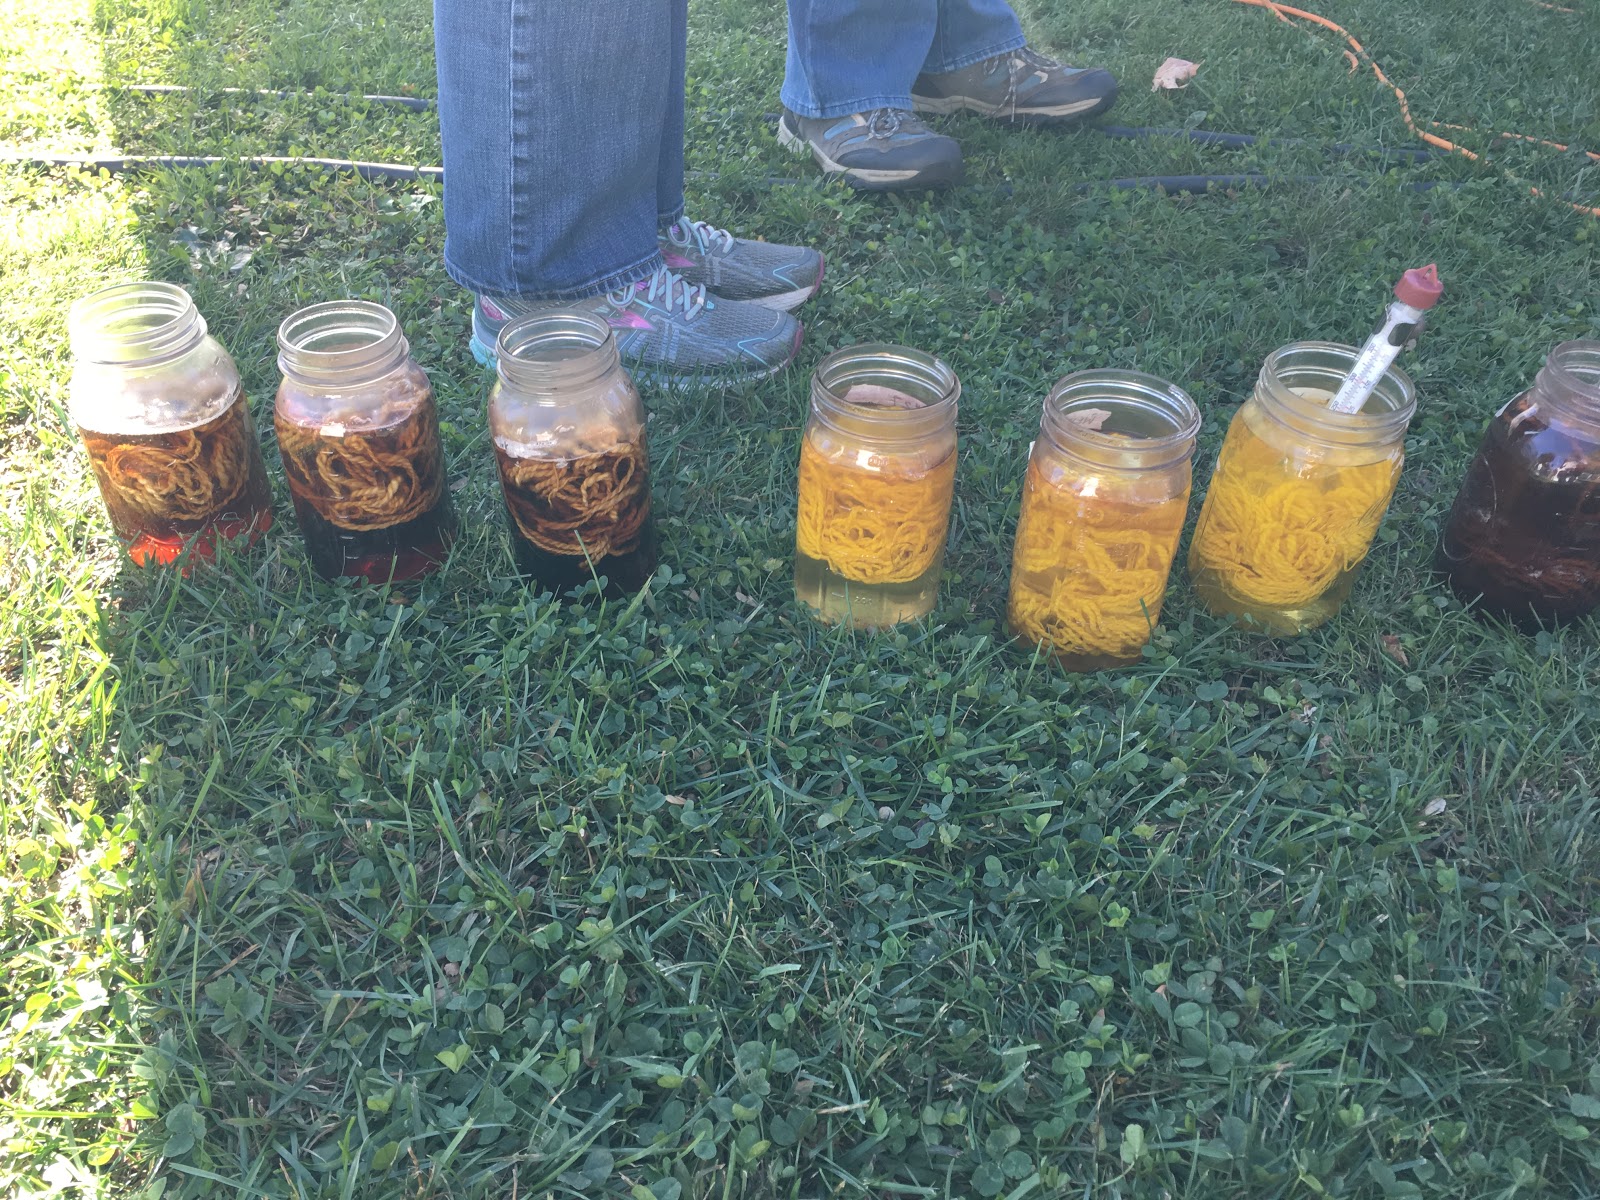
I also boiled the marigold flowers I had been freezing over the summer. I simmered the flowers for 1 hour on day. Let it cool and then simmered again for another hour the next day. Strained out the flowers on the third day. I put a white skein into it and simmered for 30 mins and let the yarn cool in the dye pot overnight. There was still dye left so I added two more skeins to over dye them. I didn't mordant as the recommendation in Jenny Dean's Wild Color was to use alum sulfate on protein fibers and I only had alum acetate. I have the original edition.
I think the color would have been more intense if I had used a mordant. But I am happy with the results. There was more dye in the pot but I discarded it as I didn't have any other fiber that was ready to dye.

This was the pure white skein. The next two were overdyed and are slightly muted from the originals, which I thought were too bright.
Overdyed:

Original:

Overdyed:

Original:

And that is it. I am really enjoying all this. I have my next weave planned but will not start till the Navajo rug is done. It is going to use up a bunch of leftover yarns.
First of all, the scarves and towels I made were received very favorably. I was surprised to some extent because knitted gifts were received well by some but not with this level of enthusiasm. I think it is due to the fact that there is limited use for knitted items in hot Chennai.
I generally just visit when I go to India. I don't have a long shopping list any more. I used to, because everything was not available here. But now I can get most things here. I wanted to buy some stretchy sari blouses, a never-ending quest. I want colors I can wear with my classic Kanchipuram silk saris so I want the traditional colors. Well, they never have them. They have more 'exotic' colors. That is great when I want to match a new sari but not so great when I want ones that will go with a variety of the saris I already own. So each time I buy one or two that I think will match. This time I got a dark blue. I bought an orange to match a new sari and a few for my sister.
I also used to buy a Christmas gift for my hair stylist. She is more of a friend than a hair stylist as I have been going there for more than 30 years. But these days, I make her a gift so there is no need to buy. I buy a gift for her when I travel outside India but I've already bought her a lot of the things that I think are nice gifts from India.
This time I had cotton punis on my shopping list as a major item. I spent a whole morning googling and calling stores where I thought they would have them. No one in Chennai had them or even seemed to know what they were. Then a Ravelry friend from Kolkata told me she got them from a local seller who travels to Wardha in the state of Maharashtra to buy them. The Gandhi Sevagram Ashram there makes and sells them. But there is no online shop. However, she generously sent me some by courier. What a lovely gift!

After my return, I started spinning cotton on my new-to-me Bosworth charkha. I bought this last summer from another Raveler. She included some easy-to-spin colored cotton sliver so I started with that. That is my first new skill. It is interesting. I have thread that varies from very fine to not-so-fine and I need to decide what degree I want and then produce it consistently. I've spun 1 spindle full.


I also started working on the Navajo rug I started in the class at Rhinebeck. Navajo weaving is very different from tapestry weaving, which it resembles. The technique interlaces the weft threads every other row so the rug is nice and tightly woven. This took me a bit of time to master. Fortunately, I had video taped the instructor when she demonstrated key techniques. Going back and watching that, trying it out, watching again, watching other Navajo weavers weave, etc. finally made it click. I am doing pretty well given I am designing on the fly as the Navajos do. It means I have to backtrack some times and of course, I have to unweave when I make a mistake - for example, I didn't cover a warp thread for 2-3 rows and had to go back.

I have finished the design of the blocks and done a stripe to delineate it from the next design. I am not making this symmetric as I don't want to have to manage the height of each piece. The warp has to be completely woven and it is tightly packed in. I am just going to do another pattern on the other side and end with stripes.
There are two sheds. The top heddle is the dowel on the top that is threaded through every other warp thread. Then there is the pull heddle that is hanging below it. On every pick, you thread something through one of the two sheds and then that holds the shed open to do the weave. I was using a pick up stick but now that is too wide so I am using a fat knitting needle. I will go down to a smaller one in a bit and then eventually one has to remove both dowels and weave using a needle. I am beating with a metal hair pick, some dog combs, and occasionally I put the pickups stick in and press down with it to make sure I have a horizontal edge.
On the non-new skill area, I knitted a hat and undid and reknit it when I was in India. I wanted to make a pair of fingerless mitts to match but I ran out of yarn. I undid the hat and ripped out an inch worth of yarn and reknit the crown. But that still wasn't enough for the thumbs. I found some red yarn, slightly thicker, and I will finish the mitts with that.

Before I cut an inch off the length.

After the re-knitting.
I also started another pair of fingerless mitts. They are still in progress and I don't have a photo.
I plied the red yarn I spun before I left. This was the last of my Tour de Fleece projects from last year. I am very happy with the yarn. That is the bobbin of plied yarn on top. I am now spinning the gradient on the bottom. I will weave a shawl with the two together after spinning. I have 560 yds of the solid red - it was 8 oz of fiber. I have 8 oz of gradient. Right now I am thinking of the solid red for the warp and the gradient for the weft. I'll spin each gradient braid separately and ply them together.

As you remember, the solid red was actually spun by holding a cool red and a warm red together. I am quite pleased at the result. It has a lot of liveliness in color and the yarn is very bouncy. One braid was Polwarth/silk and the other was superwash merino/alpaca/nylon/Tussah. I was afraid about how it would react when I finished it. I was gentle and I will be gentle when I finish the weaving. I don't want differential shrinkage where the non-superwash wool shrinks and the rest doesn't. The gradients are merino/silk so will behave like the Polwarth/silk. Note to Self: read the fiber content before you put fibers together.
I also received some lovely cotton yarn for weaving from another Raveler friend in Chennai.

There are about 250 g of each color so 1 kg in total (2.2 lbs)
She and I went to Shuttles and Needles in Chennai, which is a fabulous store. They are dealers for Ashford and Saori and have looms set up to weave and spinning wheels and spindles as well as knitting supplies. I spun a little on one of the Ashford spindles when I was there and bought one with some fiber for my sister-in-law who was fascinated by both my weaving and my search for punis. Unfortunately, I only went there two days before I left so she had 1 day worth of teaching. Now we are trying it using WhatsApp.
I also boiled the marigold flowers I had been freezing over the summer. I simmered the flowers for 1 hour on day. Let it cool and then simmered again for another hour the next day. Strained out the flowers on the third day. I put a white skein into it and simmered for 30 mins and let the yarn cool in the dye pot overnight. There was still dye left so I added two more skeins to over dye them. I didn't mordant as the recommendation in Jenny Dean's Wild Color was to use alum sulfate on protein fibers and I only had alum acetate. I have the original edition.
I think the color would have been more intense if I had used a mordant. But I am happy with the results. There was more dye in the pot but I discarded it as I didn't have any other fiber that was ready to dye.

This was the pure white skein. The next two were overdyed and are slightly muted from the originals, which I thought were too bright.

Original:
Overdyed:

Original:
And that is it. I am really enjoying all this. I have my next weave planned but will not start till the Navajo rug is done. It is going to use up a bunch of leftover yarns.