Showing posts with label socks. Show all posts

Friday, December 22, 2017

All done!

I am finally done with all the weaving I committed myself to. Now, no one twisted my arm and no one is expecting presents. But I thought it would be nice to take home-made gifts to family in India. I've always been a bit leery of taking knitted things as most of them live in warm weather places. I've given my SILs and aunt a couple of knitted shawls for use when they travel to colder places.

But now I am weaving and a woven shawl is much lighter and more useful than a knitted one. Besides, knitting with the fine yarns that one can use in weaving is time consuming. Weaving with them is easy.

I showed you the yarns I was planning to use in my last post. My plan was to warp for 2 scarves at a time and weave different designs by varying the sequence in which I depress the treadles as well as the possibly the weft. I would have warped for more scarves but I didn't have enough yarn. I would have had to use 3 colors in the warp and then a fourth in the weft. I thought that might be too much. So two it was.

I used the same basic color plan for warping. Even stripes, but I didn't want it to be half and half. I decided to put one repeat on each side in the color from the other half of the scarf. It worked really well.

This is the first warp for example. The warp is half maroon and half teal. But there is a narrow stripe of maroon on the teal side and a corresponding stripe of teal on the maroon side.


Here is the first scarf which I showed in process above. It has an indigo weft.


The same warp with a ruby weft and a different pattern.


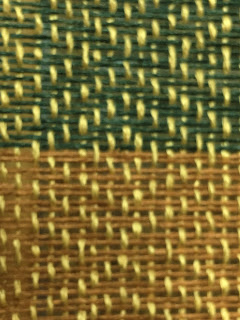
Details of the two patterns. The colors are accurate in the big pictures. In the close-ups, the camera gets a bit confused color wise.

I also finished the socks I was knitting two-at-a-time. I worked on them a little bit at a time in the evenings and finished them up on a drive we had to do for some business.


These 3 photos are the close-ups of the second pair of scarves and a sample I did with the bit of warp left over. All three use the same threading through the heddles but a different sequence of treadling. All of these patterns are basic twills where I am raising two shafts on the loom at a time and moving fairly rhythmically across the shafts.


These two scarves were done with stripes of tartan (green) and chestnut (brown) in the warp and a weft of old gold.

I also finished up two scarves with the Shetland I was using up. Now I have only a little bit of the yarn left.  These and the cotton/linen one that follows are plain weave woven on the rigid heddle loom, I am now at the point with that loom that I can warp it in a little over an hour and finish a scarf in 2-3 days.


First of the two scarves. The second is still drying so I'll post a pic next time. I'd rather wait for daylight to take the photo.


Lastly, one of my SILs doesn't wear silk so I made her this cotton/linen scarf from the same yarn I used for the towels. To break up the monotony for me, I inserted some hand-manipulated laces at various points. I had used one of these in my doubleweave workshop but had never done it otherwise.


These two are called Leno. The bottom is on an open shed (with the two layers of warp separated) and the top is on a closed shed. I like it better on the closed shed.


Then I did another called Brooks Bouquet which I like better overall. I find Leno a pain to do but I like working Brooks Bouquet. I saw this for the first time at the Ashford shop in New Zealand. The top is a closed shed and the one below is on an open shed. Here I prefer the open shed version.


And that is it for now. 10 scarves and 3 towels since Sept. Of those, 6 scarves since Thanksgiving.

Tomorrow I am going to finish sewing the hems on the towels and then will wet finish them. I also got little labels to put on the scarves that say 'Handmade with love by Jaya' and will sew those in too.

More photos to come of all that and my next knitting project. I may also take the opportunity next week of it being a bit quieter to do the travel write-up from one of the two trips.

Merry Christmas to all those who celebrate!

Wednesday, May 3, 2017

A short update

It has been a quiet week on the fiber front. I decided not to do anything on the loom while I caught up on knitting. And I've done some of that. I also have been spinning

I had made triangular pockets on the sweater. As a reminder, here is the last photo I posted of the pocket.

The issue here is that things can fall out of the pocket since it has no depth. For Cross Pockets, the designer has you knit a pocket extension that hangs behind the bottom band. However, that is a wide bottom band. I am just doing an icord at the bottom. So I needed to do something different to make the pockets functional.

I decided to add 2 inches to the length (pocket and body) where I would sew up the side of the pocket so it was vertical. That would achieve the same result as the pocket extension. In order to do this, I had to lengthen the pocket I was knitting, put the sts from the body and the other pocket on to the needles and add the length, and then go ahead and join them. 

So that is what I've been doing. I just finished the icord BO on Monday. I was going to graft the beginning to the end and then finish the pocket area to make sure it all lays flat and neat before I move on to the sleeves. But I have been having itchy eyes due to allergies. I scratched at them on Monday night and they are all swollen. It is better today but I couldn't see very well yesterday. So there was no fine finishing work going on yesterday. I hope to get to it today and will have photos in my next post.

In the meantime, I have spinning photos. I have been spinning the stretchy 3-ply sock yarn in a full project quantity. In the process, I realized that you only really see the colors in a braid when you are spinning. Looking at the braid only lets you see the large color blocks and not the lovely transitions that occur between colors. 

This was the braid. As you can see, it is mostly blues with some yellow and bright green in it. It looked pretty monochromatic to me. When I opened it up, I realized that most of the yellows were concentrated in one area of the braid. If I split it vertically into 3 as I usually do, there would be  only one section of the yarn that would have the yellow. So I split it horizontally into 3. This way the yellow would be predominant in one ply and be spread across the whole length of the yarn. 

However, as I started spinning, I realized that there are sections of green in other areas. This is from the first ply.


And some lovely violets and ceruleans in the second ply. The cerulean is hidden under the very light blue layer on the left of the bobbin. The violet was surprising. After I spun this and I looked back at the original braid, the green and the violet jumped out at me. But when I first looked at it, they were overwhelmed by the blue and the yellow-green. I am really looking forward to this yarn and I may not use it for socks after all. The colors would make a very wearable shawl with my usual uniform of blue jeans and T-shirts.


This is the first bobbin, all spun up. You can see the green in the single here. Of course, when it is plied, it will also have the colors from the other plies at that point but the green will show up as blips of color and will get accentuated by anything I wear that will is green. 


My recent scientific sampling (from the previous posts) has also led me to actually make a control card for this yarn. I have samples of the singles taped on to it and a plyback sample showing the amount of twist. You can see that in the bottom right of the card. A plyback sample is just letting the singles ply back on itself when it is freshly spun and the twist is active. I do plyback samples a lot but I never keep them. I just look at them, undo the plying and wind them onto the bobbin. I am doing this temporary plyback a lot while spinning this to make sure that I am maintaining the under-spun low twist desired state. I plan to put samples of the washed and unwashed 3-ply yarn on the card also. But I am not sure what I will do with it. This is why I don't usually make cards. Let's see. Maybe it will come in useful.

The low twist has resulted in a few times when I didn't have yarn. The singles just came apart and I had to go back to a spot where there was enough twist and then add more to the part that was falling apart. I hope the plying works because if it doesn't, it will be a pain to recover. This is why I started with a braid that I wasn't too enthralled by :-)

I am almost done with the second singles. I have about 8-10" to spin which is a couple of hours at most. The third one is the one with all the yellow-green, so I am looking forward to that and saved it for last as an incentive. 

Thursday, December 10, 2015

What to do with hole-y socks Part 6 (and last)

 Finally! We will go on to another topic next week. But i have to share this last item with you but I am so excited about it. This will work for you if you don't wear through the toes of your socks, because we will be using the toes.

 I always felt bad throwing the toes out. Not very bad, but just a little bad. And the result of this is such a useful object for me. I am a headphone junkie. I have lots of different headphones. Some are for running, some are for sleeping, some are for planes, etc. They are a pain to keep neat. The more expensive ones come with their own case but the cheap ones don't. So this pattern for a earbud case hits the spot extremely well.

 Pick up sts at the top of the toe. You may be able to use yarn you've unraveled but usually there isn't enough to actually knit a case. So attach a piece of yarn from elsewhere in the sock, or a new piece of yarn. In this case, you can see a little of the st pattern right below the needles. This is important because you want a bit of a straight part before you start decreasing. Sometimes you will have enough to just start decreasing. At other times, you will have to knit straight for a bit before you start decreasing. All of this is rather organic. I have been knitting straight for about 1/2" to 3/4".

 Once the straight part is knit, I start decreasing 4 sts on every other round, exactly as you would decrease for the toe. The idea is to reduce the circumference a bit to hold the earbuds in place. The case doesn't need to go down to a very narrow top. I decreased 4 times, so 8 rounds of decreases. Then I switched to rib and ribbed straight for 8 rounds - which is about 1". Then a loose bind off in rib. That is it.

 The other side is from the sole so there is not little row of patterning.
 Earbuds in the case.
 A view from the side.
 The earbuds next to their case so you can see how big or small they are relative to the case. I ended up with two of these from the pair of socks. One lives by my bed for my night-time earbuds and this one lives in my purse with these earbuds that I use for walking, running, housework, gardening, etc.
 I also made another one from this sock. You can see the shape is a bit different. In this case, the sock was knit with slightly bigger needles but I was lazy and didn't feel like digging out another set of needles so the top of the earbud case was knit with a smaller needle that the bottom. But it works.
If you wear a hole through your toes, you can easily knit one of these cases. I would just start with a slightly wider bottom - maybe 40 total sts in a sock gauge rather than the 24 or 32 we usually start fingering gauge socks with. That is both sides of the cast on, using something like Judy's magic cast on. Increase every other round 5 times which will result in 60 sts (40 cast on + 4x5 increased). Knit even around for 1" or so and then do the decreases and bind off as above. If you have larger earbuds, then you can make it larger.

Interesting, isn't it? These earbud cases also make good quick little gifts for people and there is time to make them before Christmas!

I think I will do a travel post next week as I don't have anything else to write about re: knitting or spinning. I need to get the spinning wheel going again but I've been busy around the house and with other things on weekends. 

Tuesday, December 1, 2015

What to do with hole-y socks Part 5

 I am sure you are wondering when this will end. Soon, my friends, soon... Even I am totally out of the upcyclling mood now. I am just documenting what I've already done.

 Over the years, I have made many mug cozies. Unlike the disposable cup cozies, these involve having to go through a handle, and therefore need an opening in the side. I love the idea of a sweater for my mug as I think hot liquids in ceramic mugs cool off way too fast. But I have not come up with a perfect design yet and I will continue to experiment.

 The last one I made a few years ago was a coaster/cozy in one. I attached a circular coaster to the bottom of a cozy similar to the one I will show you. But it falls off half the mugs I've tried it on. Attaching a coaster is not a great idea, either. But these experiments have taught me many things about cut knit edges which has helped with steeking real knitted objects. If you are afraid of steeking, what better way to get over it than by cutting into a sock with a hole? What is the worst that can happen? You have to throw it out!

 In this case, after I made the finger-less mitts, I was not happy with the way the cut edge unraveled. I stabilized with sewing after the fact but I thought, why not use a crochet steek? So I tried it.
 I started with this. It is the leg of a sock, with a hem where it has been cut. The ribbed edge is the cuff of the sock.
 Crocheted steek instructions can be found on Kate Davies's blog, and Eunny Jang's blog. I am not going to cover them here but focus instead on working the technique on a tightly knit sock. I used sock yarn and then I went to thin crochet cotton, which I did not photograph.
 It is possible to work a crochet steek on a sock, but it is not worth it. I ended up having to use a very tiny crochet hook to get into the stitches. That hook kept splitting the yarn and the crochet cotton. But I persevered.


 And finished it. Once fully across the length of the piece and then part-way across. I pulled them both out because it was way too bulky. You can see that in these photos. That is only one side of the steek. I'd have to repeat that on the other side and the bulk would be way too much. Not pleasing at all.

 So I went back to another steeking technique that I used on my Rose Lace Collar. It is fast, holds quite well and adds no bulk at all. What is it? Back stitch along one leg of a column of stitches. On the Rose Lace Collar, I did 2 rows of back stitch - one along each of the legs of a column of stitches. But for this I just did one.

 Can you see it? I used a slightly different color of blue. The thread is doubled and I just make sure that I am making tiny stitches so that each knit stitch is secured by at least one back stitch. It took me less than 10 minutes to do this with a lot less aggravation than the crochet. It worked like a charm. Those are the cut edges above in the two photos - one of each row of back stitches.

 I stitched down the right leg of one column of stitches and up the left leg of a column of stitches with two separate rows of back stitch. I left one whole knit stitch in the middle of the two rows of back stitch. I cut along the center of that column of knit stitches. So it was very close to the stitched row. For a larger project, I would probably leave a bit more space. For the fingerless-mitts, I probably wouldn't.

 Then I picked up just below the backstitched row - 3 stitches for every 4 rounds of the sock - and did a 2x2 rib o each side. On one side I worked 4 yarnover buttonholes. That is just a yarnover followed by a p2tog to keep the rib pattern but it could be a yo and a k2tog and one can work the decrease before or after the yo.
 Completed ribbed edges showing the insides. I whip stitches the edge to the ribbed edging to keep it neat.
 Finally, I went through my button collection (mostly from sweaters and coats that I no longer own) and found 4 small buttons. The yo buttonholes were very small given I was using 2 mm needles. The buttons are all the same size but they don't match. Oh well.

 The problem with this mug cozy? It is too tall for most mugs. So I still don't have a great mug cozy design. But this one will also work for disposable cups (unlike my coaster attached one) and can be used on insulated mugs, if needed.

 I have one last item I made from sock parts and I think it is a winner. They are earbud cases and they use parts of the sock that I've discarded so far. So hold on and the series will soon be over!

For your viewing pleasure, here is a photo of my Jenkins Turkish spindle family and a couple of sample skeins I spun on two of the newest members.
 From left to right, Egret, Swan, Agean, Lark, Delight, Finch and Kuchulu. I got the Egret at Rhinebeck but haven't spun on it yet. The Lark and the Finch were acquired recently in updates at the Jenkins website. I just happened to be online when they were going on sale and I lucked out in getting them. They sell out in minutes.
 Abstract Fibers Merino/Superwash Merino/Silk in Huckleberry spun on the Finch.
Abstract Fibers Targhee in Hopworks spun on the Lark. I didn't think I would enjoy spinning dyed brown fiber but I did. 

Tuesday, November 24, 2015

What to do with hole-y socks Part 4

 One of the easiest things to do with hole-y socks is to make wristlets or disposable coffee cup cozies from them. This is easy because the leg of the sock is the correct size, in most cases, for these applications.

 Separate the leg from the rest of the sock by snipping a stitch and unraveling a round just as for the fingerless mitts. Measure the length needed. In the case of my socks, the leg is usually a couple of inches too long for wristlets and enough for a Starbucks Venti cup - so way too long for most other disposable coffee cups. I unravel a few inches of the leg to get the correct length. Note that if your socks were knitted toe-up, you can't unravel in that direction. You have to snip the stitch and separate at the correct length for the finished object allowing room for your edging. There are a couple of other options to get the right length. One is to make a folded hem at the bottom (on the heel side vs. the ribbed cuff side). Another is to fold the ribbed cuff in half to reduce its length and make a hem there. Putting a hem at the bottom allows for a disposable cup that is much wider on the top compared to the bottom. So the heel side of the leg would be on top of the cup and the ribbed cuff would be on the bottom. If you fold over the ribbed cuff, you can have it be the top or the bottom of the cup cozy.
 One sock is sufficient to make a cup cozy and a matching coaster set if you have holes in the heels or near the ball of the foot close to the toe. You need enough solid fabric in the foot to make the coaster (or the cozy).

 Here, I separated the leg, folded over the hem and sewed it down. I also did a few rounds of garter st on the bottom (near the heel) before binding off.  I have a cup cozy and a foot.
 Looking at the foot, I want to orient the coaster so one side has the slipped st pattern and the other has the plain sole.
 I cut interfacing to provide some stiffness to the coaster. I had some really stiff interfacing so I used that. It is a fusible one but I didn't fuse it.

 In this case, I made a mistake and didn't pick up the freed sts on the foot and made quite a mess as I was undoing the gusset. So I made a seam rather than a 3 needle bind-off, which is much nicer. I folded the messed up part inside and sewed one seam with a back stitch from the wrong side. Then I inserted the interfacing, folded the other edge inside and whip stitched it. So the two ends don't match.
 Here is the coaster - the slipped st side...
 and the stockinette side.

 On another sock, I did a better job because I learned my lesson. Don't undo both sides of the coaster at the same time and don't lose your sts. I picked up the sts as I was undoing the last round and was able to do a 3-needle bindoff on the one side of the coaster. Then I inserted the interfacing.

 I had 2 feet leftover from making my fingerless mitts. So I cut 2 pieces of interfacing and made 2 coaster.  I removed the toe at this point so that I could carefully pick up the sts as I undid the round. You can see that I already have the sts on the needles above. After inserting the interfacing, do a 3-needle bindoff on the other side.

 And there you have it. A much neater coaster. What I love about these projects is the fact that I can learn and mess up without too many consequences.

 Next up, I'll show you a good way to stabilize a cut edge for fingerless mitts and mug cozies and a little sweater I made for a cup. However, it is too long for most of my mugs so it will  have to wait for the odd Venti drink that I order.