Showing posts with label roving. Show all posts

Saturday, September 7, 2013

How to make stitch markers

After last week's stitch marker making session, I was motivated to make more this weekend. I went back to my old method this time. I also took photos to show you how I have been making them.

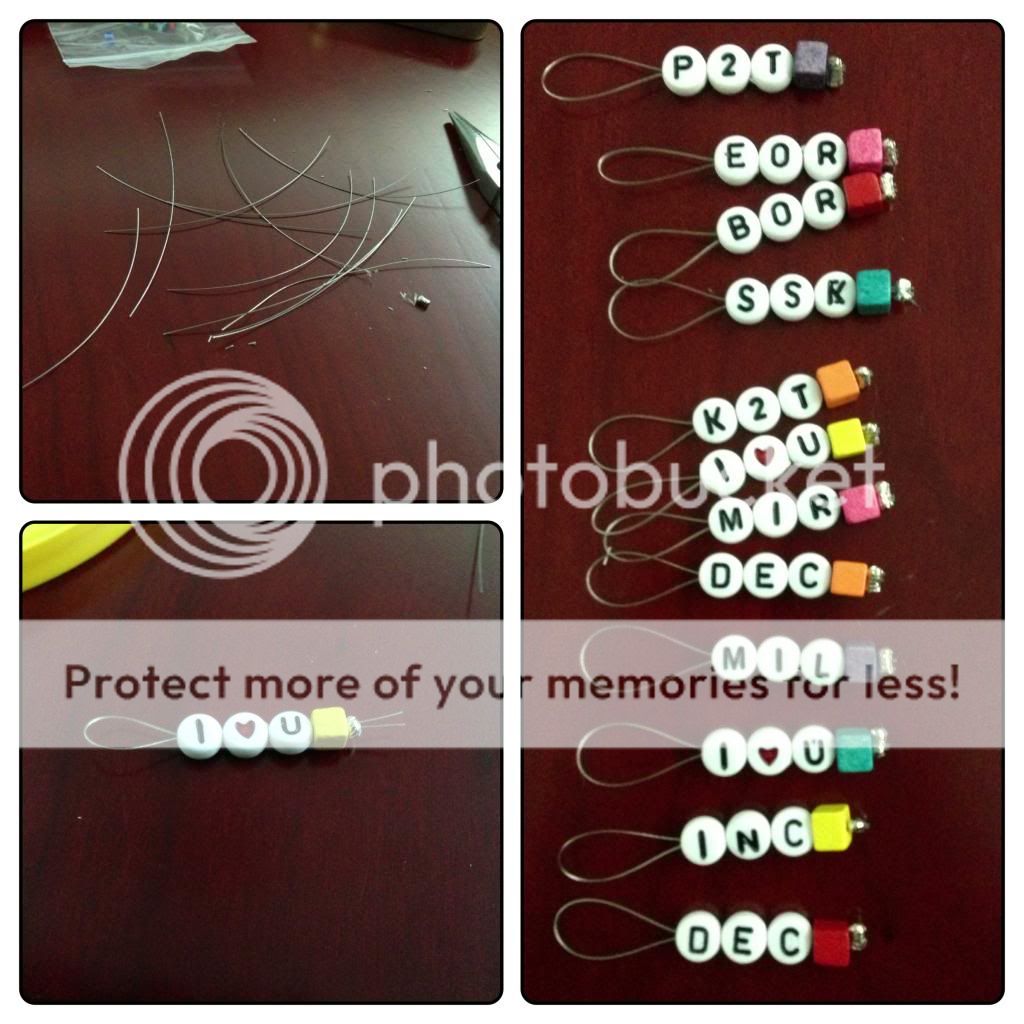
I used braided memory wire for these sets. It has a bit more body than the monofilament that I used last week. Starting at the top left, that is the wire I use. I like it for body and thickness. It cuts easily with a pair of sturdy scissors. Next up are the letter and number beads laid out to make the knitted abbreviation markers. I also add a little bead and crimp to close off the end. However, I didn't measure the wire the first time I cut and cut them too small. So the top right photo shows the smaller markers I ended up making first. The bottom photo is that of the completed markers.

Then I cut more wire to about 4" - which is what is needed for these markers. Each marker has 3 letter or number beads and 1 colored bead to help differentiate them quickly if the abbreviation doesn't make sense. After all, there is nothing that says these must be used where you are going to do some knitting action.

I fold the wire in half and put both ends through the beads in order. This requires a bit of concentration as it is easy to put the bead on up-side down. All the beads need to be oriented the same way although right-side up and up-side down don't make sense except in relation to the other beads. Then I thread on the colored bead and the crimp. I move the beads out of the way, move the crimp to the very edge of the wire and then crimp it with a pair of pliers. Lastly, I trim off the tiny ends of the wire sticking out beyond the crimp.

And voila! a stitch marker.

I have put crimps on both ends of the beads also. To do that, you thread the wire:
  1. Crimp first
  2. Beads in the same order as above
  3. Crimp again
First you crimp the bottom crimp (#3). Then you slide the beads and crimp (#1) down and then crimp #1 so the beads are held tightly between the two crimps.

It took about 90 mins to get everything out, laid out, markers completed and the place cleaned up. I made 24 markers today - 12 of each kind.

I have also been spinning a lot this week. Remember the Briar Rose BFL I started last week? I am done with one of the two lots already.
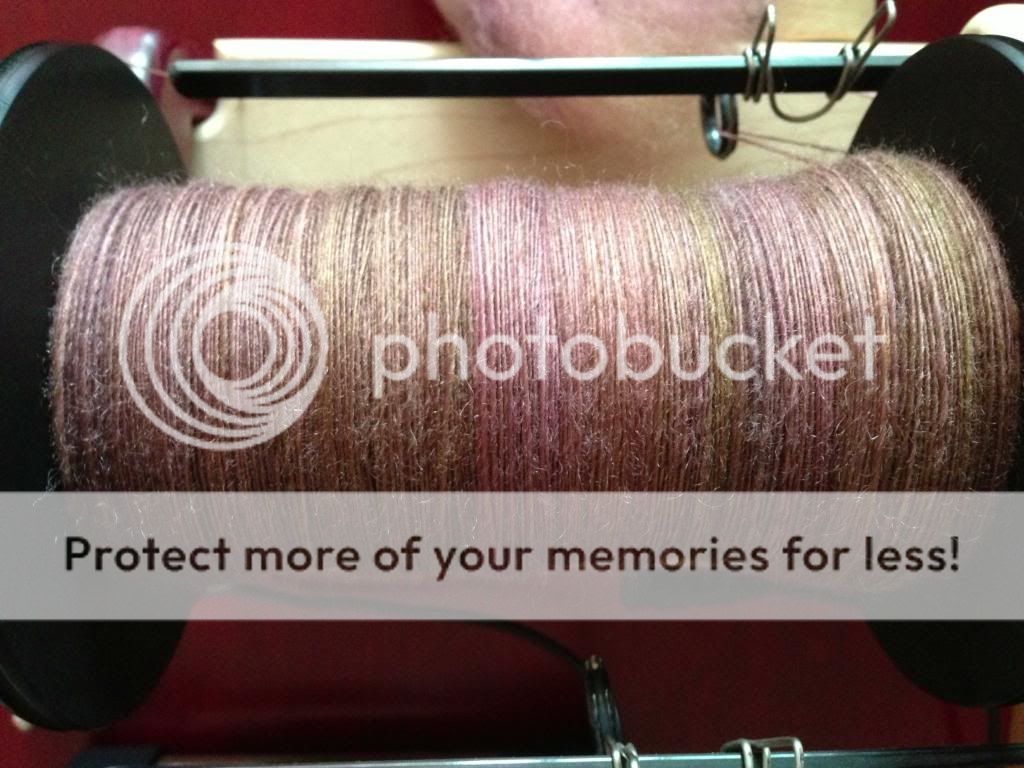
And here are the two colors next to each other. I will spin the other color and then ply a bit together to see how it looks. I may even knit it up into a swatch before I decide to go ahead and ply the rest. I don't want to mess this up because I love these colors!
That is all for this week. I will be doing another travel post soon and then there will be more fiber stuff. I have some ideas that I am working on which I want to share.


Tuesday, March 26, 2013

Color!

Here it is!
It drafts really easily and I am enjoying seeing the colors coming off the roving. It is making a very elastic, lofty single so I have hopes that my objective will be met!

Saturday, November 10, 2012

Spindling a gradient part 2

A while ago I wrote about spindling a gradient roving - one that starts one color and works its way over to another. I am part-way through it now so I can continue with the update. My plan was to spin one single all the way through but I found that the spindle was getting very heavy about half way through the single.
Here is the spindle full of yarn and the remainder of the roving. I also realized that I had to plan out the whole thing so I could keep the color consistent with the roving all the way through.
I thought it would be good to illustrate this via a diagram. You can see both halves of the roving laid out here. I started spinning at A and am now at B. A is the inner end of the single on the spindle in the picture above and B is on the outside. Normally I would wind off this cop and then continue winding off the rest of the single onto the same cop. If I did this, I would start the second half of the single with B on the inside and C on the outside. Adding it to the wound off first part would result in C being next to A. That would mess up the colors in the roving.

So I need to wind off each part separately. This is the first bobbin, with B on the inside and A on the outside. When I finish spinning the second half, I will wind it off onto a different bobbin. C will be on the side and B on the outside. Then, after I finish the second single the same way, I will have 4 bobbins: 2 of A on the outside and B on the inside and 2 with B on the outside and C on the inside. I just have to ply the first two bobbins together and the second two bobbins together to get a yarn that matches the roving.

Makes sense?

Monday, October 22, 2012

Rhinebeck 2012

I am still in a daze after a glorious weekend at Rhinebeck. I know that too much of a good thing diminishes its value, but I could live a life full of Rhinebeck weekends.

It started early for me. I took a breed study class from Beth Smith on Friday. She is a font of knowledge and extremely organized. The amount of information she managed to impart in 6 hours was phenomenal. I don't have pics of the class but I have results.

 We got samples of 12 different fibers. We flicked the fine wools, combed the long wools and carded the down breeds (or something like that). We then spun each one into samples that we put in folders. The folders were categorized by color. Beth gave us index cards for each folder with the name of the breed on it.
It all makes me look incredibly organized, doesn't it? I spun and plied most of my samples. There were a few that are still singles. Some were ply-back samples but many of them were actual 2 plies. I got very good at Andean plying!
Since we didn't have time to play with all the fiber we received, Beth provided bags and labels so we could put the rest of the sample aside and play at home. Here is my set of 12 breed samples. I spun all but two. I had to skip the two just to keep up with Beth's pace. For the first time in a long time, I felt brain dead at the end of the class.

I was one of the first 250 to enroll in class so I got a goodie bag. 
It had goodies in it.
 
A ball of sequined acrylic yarn from Lion Brand along with a tape measure. Another tape measure from Webs. One cannot have too many tape measures. A small sample of fiber and some coupons. I didn't use the coupons as I forgot the bag at home on Saturday and Sunday.

It matches my Rhinebeck bag from last year, which is a great size and very, very useful. I use it all the time to haul things around.

It poured on Friday. In the middle of class, we had to go and move our cars to avoid having them flood. As a result, my shoes, socks and pant hems were all wet for most of the afternoon. But it was better than having water get into the car's innards.

I went early on Saturday to help out at Jennie the Potter and Briar Rose's booths. It was hard work as both booths were mobbed as soon as the festival opened. It is a good thing that I'm an extrovert, isn't it?

I bought this lovely little bowl from Jennie. 
No, those are not cracks. Don't even think that!
It fits my supported trindle perfectly! And speaking of supported trindles, guess what I bought for mine?
Pretty disco ball jewelry! These are heavier arms that the red skulls above.

I also wandered over to the Fiber Optic booth and bought some gradients.
 This is Ebony-Gold-Crimson.
And this one is really hard to see but it is called Midnight and has some gorgeous blackish shades.

That was pretty much all I did on Saturday. I wandered around some with a visiting friend, but was tuckered out by 3 pm and left to go home and rest.

On Sunday, I had volunteered to help out with the workshops. I got there early to check people in and show them their class rooms. This is fun because I know some of the other volunteers but I always get to meet a few new ones. I also saw some familiar faces in the students.

Another friend was visiting Rhinebeck for the first time on Sunday so I spent the day with her. And in the process, a bunch of stuff came home with me.
 I  bought these carbon fiber double pointed needles from Sheila and Michael Ernst.
 Handspun by Stefania is one of my favorite vendors. I got two 8 oz bumps of roving from her. The one above is dyed with Indigo and Iron. The one below is Lac and Cochineal. Her fiber spins like a dream!
 Another favorite is Lisa Souza. This was my first time seeing her fiber in person. I got two 4 oz bumps from her. The one on the left is baby alpaca/silk. The one on the right is just marked wool but I think it is BFL. I fell in love with the colors.
 Lastly, Chris of Briar Rose Fibers gave me these two bumps of Cormo top as a reward for keeping her Sea Pearl yarn presentable all day Saturday. More color!
I also visited the Hansencrafts booth and came away with two cool pins.
I also bought some hand cream from Maggie's Farm, lotion bars from Heal my Hands, and soap from Bittersweet Ridge. I love hand-crafted soap and cream and they do wonders for my skin. So I stock up at Rhinebeck. I also talked (I hope) Maggie into making lip balm in tubes. My favorite lip balm vendor was missing this year and there was no one else making balm in tubes.

And now all I have are fabulous memories and gorgeous fiber. As I spin and knit these, I will remember the place and time that I bought them and the friends who were there with me. After all, it is all about the memories and the good times, isn't it?

Saturday, September 1, 2012

Making multi-colored yarn out of single colored fiber

We spent a half day making lots of multi-colored yarns from a pile of solid colored rovings. I am showing you some pictures of the samples Maggie showed us along with some of my experimentation.

First and simplest in concept is to hold multiple rovings together and spin them. Judith Mackenzie showed us an example of this in a retreat I attended last year. I will talk some more about that later as I experiment with that technique myself. But Maggie's ideas are simpler. You can hold the rovings together and spin as is - across the colors or you can predraft them together. Predrafting blends them a bit more as the colors thin out. You can also predraft more of one color to get more of it in the mix. These two pictures are of a sample knitted like this.
Another option, to create an ikat effect, is to plan the lengths of the colors in the yarn you want. Maggie had a knitted sample like this but I am showing a woven one. The warp was spun with longer lengths of the white with the other colors having shorter lengths. The weft was spun with very short bits of the other colors so they wouldn't pool on the shorter width of the scarf. One way to get really short bursts of color is to spin them over the fold. Maggie had a mosaic knit piece that looked as if it had been knitted with a Noro-like yarn. What she had done was spin that with solid colors spun from the fold so each color was a very short length in the final yarn. This made each part of the mosaic that showed have a different color in it. Very cool.

This next set of samples was to do a gradual change of color by spinning sections of solid color with transitions planned by holding the two colors together. The advantage of this, if you want to plan it out, is that you can spin longer lengths of color for the body of a sweater and shorter lengths for the sleeves so you can get the same width of the various colors in both sections. Also, for a triangular shawl, you can increase the lengths of each color segment to accommodate the shawl's getting wider from top to bottom.

If you want to spin for socks and want even stripes, you can measure out the length of each color and spin your singles in the same color sequence. The key here is rewinding the bobbins and starting to ply from the beginning so that the colors match up better and slight variations in the length will become color transitions.

Now, similar to Judith's technique, Maggie showed us two samples. One was spun across the web, worsted, with multiple colors. You hold them together and spin across the colors to get lengths of each color in the single. You can also spin woollen long draw by spinning one for a while and then another.
The sample below is a 3 ply spun this way, with more periwinkle than the other colors.
The sample below is a 2-ply spun with 1 color more than the other. It was spun long draw with more periwinkle than the other colors. 3-ply tends to blend the colors more than 2-ply.
Blurry pictures of the entire samples below. Sorry about the quality of the photographs. Maggie was showing them to us, talking about them and then passing them around. So I was listening and observing and photographing as they came around.

 I spun some singles in various ways but then I picked a bunch of colors and drum carded them together. Below you can see a sample skein I made by woollen spinning 3 different colored rovings and plying them together. When I ran out of one, I continued with just a 2-ply. You can see a bit of it where it is just brown and gold.
The drum carding was fun. This blends the colors more and gives you little heathered bits of color as you spin.
One side of the batt.
The other side of the batt.
I then spun a single, woollen long draw, from the batt. I plied that single with my other colored singles and even some worsted that we had been spinning when we were talking about worsted-spun yarn. So there are a lot of colors in this skein. The colors move from one to another with varying lengths based on what I was trying.
This was one of the most fun parts of the class. We played a lot with colors. I have some solid colored roving from Judith's class and I plan to play some more to practice these techniques. I hope this gives you ideas and inspires you to play with some of the fiber you have. You might not like a color by itself and you can spark it up or subdue it by mixing it in various ways with other colors. You could card them together, of course, but you don't need to.

Sunday, October 24, 2010

Lots of stuff!

I didn't post last weekend because I had a busy weekend at the NY Sheep and Wool Festival. I have no idea why I didn't post the previous weekend. So, to make up for all that, I have a lot to talk about today. It is a real mish-mash of stuff.

First of all, aren't these cute? They are popcorn cobs from my CSA Farm. Apparently I can pop them right on the cob. I haven't tried that yet. It will be a treat for the week.
A couple of weeks ago, I had an open house at my place for some of the local knitters I've met through our local yarn store. It gave me the opportunity to photograph these two Faroese shawls that are similar to the one I made from sock yarn. It is a great way to use up those single skeins of sock yarn and because the st count varies with each row, you don't get splotches of color.
Here's a photo of our happy crowd! We were so happy to sit and chat and eat lots of goodies. Everyone brought goodies so we had more than we could consume.
Another photo of all of us. So many bags of knitterly things...
Now, on to my activities on the fiber front...
I've made good progress on the silk featherweight cardi. The body is done and I'm on the first sleeve.
I also got a haul of red mink/cashmere yarn from Great Northern Yarns. I wore the shawl I made from it to the Sheep and Wool Festival. It kept me warm and lots of people fondled me (in a very fiber-y way). My hands were kept warm by the fingerless mitts I made from the leftovers. One of the knitters at Camp had a jacket made out of this yarn and she inspired me to make one for myself.
In contrast to that lovely yarn, here's my very first spindle spun skein! It is a mix of different fibres but it was spun and plied on my Bosworth spindle. I took a class at the Sheep and Wool Festival for the first time. I plied the yarn in the class and finished it this morning. It isn't much but I'm proud of it.

Now on my acquisitions from the Sheep and Wool Festival. I had a ball most of the day helping out at Jennie the Potter's booth. It was a very exciting day and it helped me keep my purchases to a minimum. I really need to make a dent in what I already have rather than adding to my stash.
I bought a niddy noddy to make skeins from my handspun. It is a pretty basic one.
I bought a Golding Tsunami spindle made of purple heart. There is a better picture further down on the Golding page. It is a lightweight spindle, to complement my mid-weight Bosworth. I want to try spinning some laceweight.
Lastly, I bought 3 oz of Icelandic lamb roving from Frelsi Farm. The black yarn in my spindlespun skein above is Icelandic roving and I loved spinning it. The lamb is very soft but supposed to be easy to spin. So I thought I'd try it on the spindle.

The class really re-ignited my interest in spindling and so I am now going to do some more with it. It probably will mean even less knitting. I'm not sure how to fit everything I want to do into my life!