No knitting going on here. I finished the silk sweater up to the armholes. Now I have to split the sleeves from the body and start knitting the body. It is just sitting there.
I have wanted to update the blog for the past couple of weeks but somehow, even that seems uninteresting when I have nothing to show you. I played with the blog format a little, hoping that will enliven it.
I just passed the 3rd year anniversary of the blog. That seems such an achievement! I am motivated to continue but given that I am knitting so little, I wonder what I'll post about.
Lastly, my yarn store is closing and I will be using this blog to communicate about my classes. I am planning to continue teaching from my house because I love it so much. But first, I have to get my knitting mojo on.
Sunday, August 29, 2010
Sunday, August 8, 2010
Silk: it is what's for summer
I have always been a lace or sock knitter in the summer months when I am rational. When I am irrational, I have knit heavy sweaters and bulky shawls and almost died in the process. This summer, I am enjoying the process of knitting with very fine silk. It is light and easy on the hands, and doesn't add any heat to one's body.
You probably saw the cone of silk when I was asking for opinions on what to knit for Camp. The swatch on the right is the one I knit before Camp that gave me a slightly smaller gauge than the pattern called for. The one on the left is the one I knit after, with 1 size bigger needle. Now the number of rows and stitches are not the same in the two swatches so they aren't comparable by observation.

Swatch on the right was on 4 mm needles:
Swatch on the left was on 4.5 mm needles:
Pattern gauge:
- 36 sts = 5.5 - 5.75 inches (depending on how I pat it out) - not quite 6 spi
- 42 rows = 5 inches - not quite 9 rpi
Swatch on the left was on 4.5 mm needles:
- 30 sts = 5.5 inches - more than 6 spi
- 54 rows = 7 inches - way more than 9 rpi
Pattern gauge:
- 24 sts = 4 inches - 6 spi
- 36 rows = 4 inches - 9 rpi

In this photo you can see the top of the shoulder and the front to the left, and the rest of the cardi bunched up on the right. I wanted to show you the raglan line treatment that I am doing. I am not following the pattern on this as I love this particular raglan line. I may also add some lace to the bottom to lengthen it but that is a decision for later. The color is lovely, the yarn is beautiful, it is relatively easy knitting and very relaxing for the summer.
Sunday, August 1, 2010
Tutorial: Cup holders
Since I haven't done much knitting this week, I thought I would give you some ideas. If you have been knitting socks as long as I have, you end up with socks that have holes in them. Even if you darn them, eventually the sock fabric is so thin that you have to either re-knit the thin part or toss it out. But there are usually other parts that are in perfect shape and it is a waste to throw the whole sock out. Today, we will reincarnate sock legs into cup holders. They make quick gifts and you can make one to fit every cup you will ever use and keep them in your purse, your backpack, your tote, your car, etc. Each pair of socks makes at least 2 cup holders.
 Here is one of my dearly-beloved socks. The sole is really worn thin.
 I snipped a thread right where the heel began. This is where the thin part is. My socks wear at the heel and the ball of the foot. Then I unraveled a row of sts. This is a top-down sock so unraveling is easy. If it is knit toe-up, wait for the next tutorial because the sock won't unravel properly in this direction. Here you can see where I cut and separated the good part from the worn part.
 Next, measure your cup and mark that distance on your sock leg, starting at the cuff. Unravel the yarn to about 1" shorter than that mark. Wind up your yarn into a small ball so you have it to knit from. If you can't do this, or your sock leg is too short, find some yarn of a similar weight that will look good with your sock and use it.
Now knit 1" of ribbing in either your unraveled yarn or the matching yarn. Don't worry about kinks in the unraveled yarn. They will go away when you wash the cup holder. Bind off loosely in rib and ta-da! you have a cup holder. Here is the pair I made from those socks. They fit a Starbucks Grande and a Venti cup.
 If you don't have worn out socks, do not despair. Just take some left over sock yarn and knit yourself a sock leg without a foot and you have a cup holder.
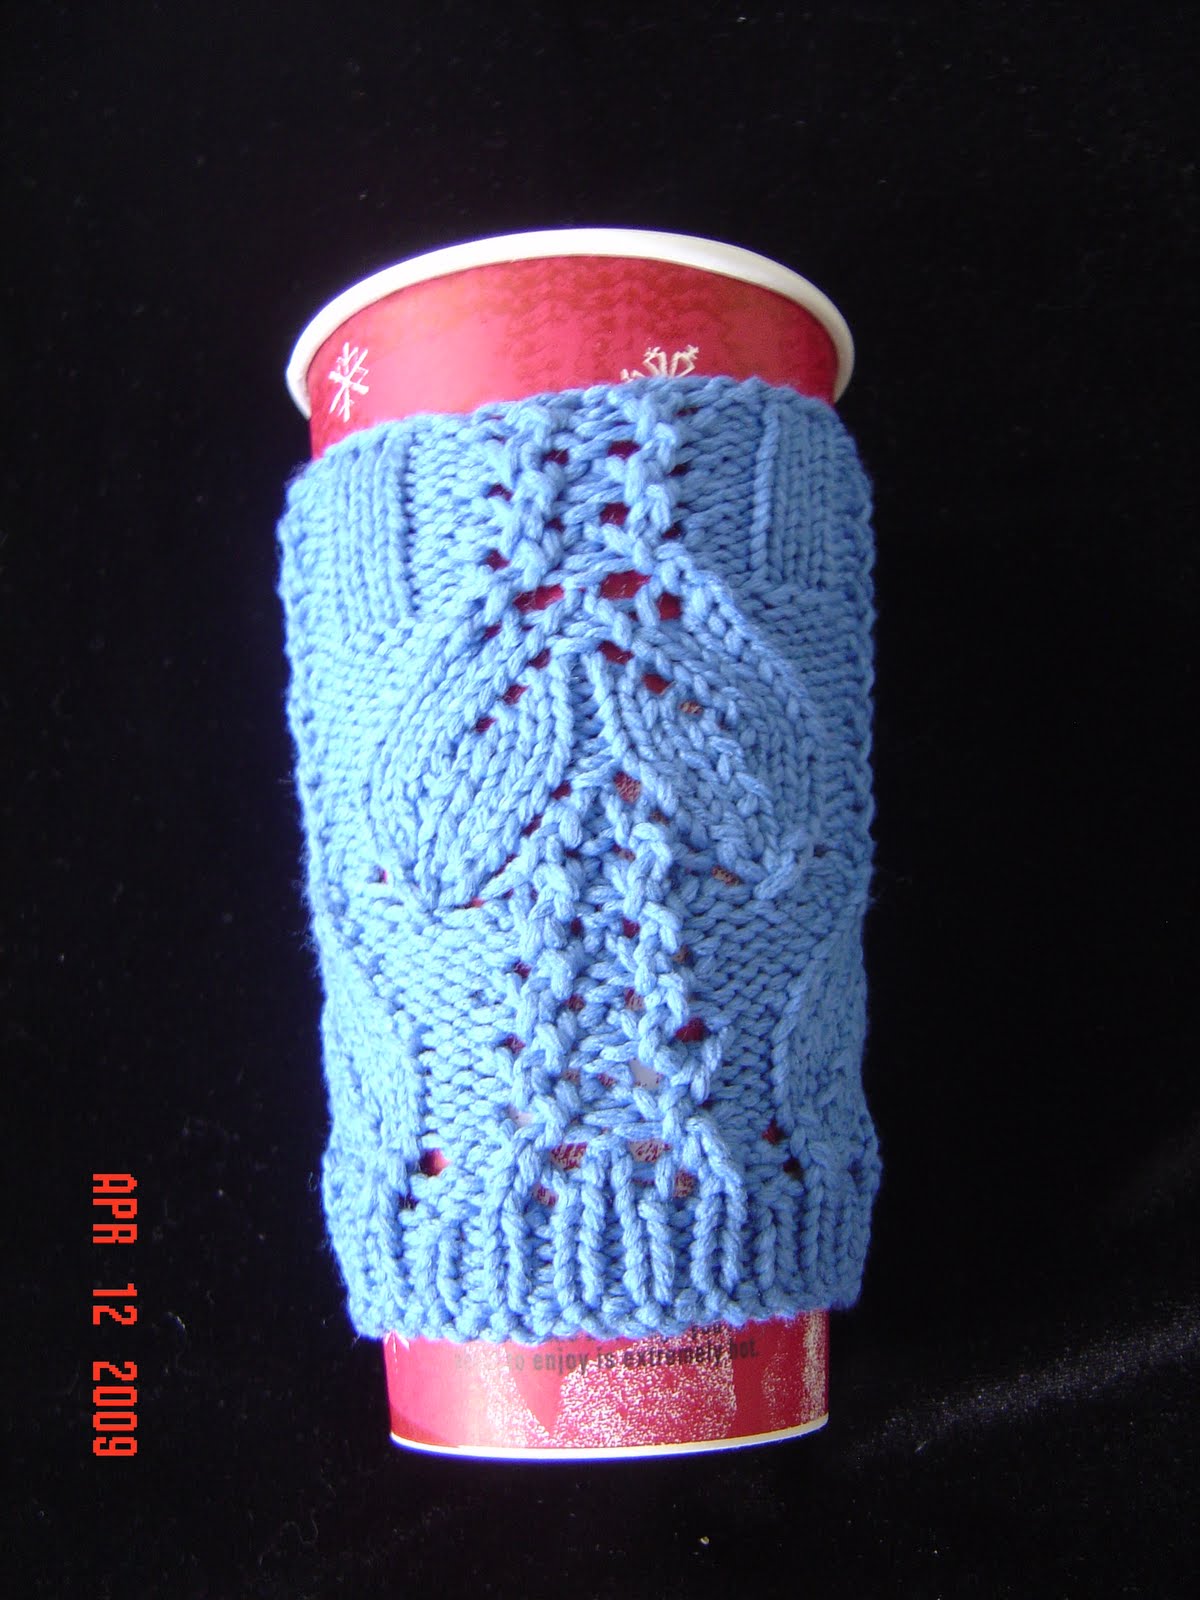
It is a matter of preference whether you like the cup holder to cover the entire cup (as above) or leave some space at the top and bottom (as below). The lid will cover the lip of the cup but sometimes I like to take the lid off and drink. If you are like me, you will prefer the holder to be slightly smaller than the cup. The cup holder below fits a number of different cup sizes.
 You can practice a new stitch pattern (as I did) or make it plain with some ribbing. Your cup holder will keep the drink warm (or cold) and prevent condensation with cold drinks.
You can also make ones that fit your water bottle to keep the condensation from dripping onto things.
Use your new eco-friendly (recycle, reuse) cup holder and water bottle cover in good health!
 Here is one of my dearly-beloved socks. The sole is really worn thin.
 I snipped a thread right where the heel began. This is where the thin part is. My socks wear at the heel and the ball of the foot. Then I unraveled a row of sts. This is a top-down sock so unraveling is easy. If it is knit toe-up, wait for the next tutorial because the sock won't unravel properly in this direction. Here you can see where I cut and separated the good part from the worn part.
 Next, measure your cup and mark that distance on your sock leg, starting at the cuff. Unravel the yarn to about 1" shorter than that mark. Wind up your yarn into a small ball so you have it to knit from. If you can't do this, or your sock leg is too short, find some yarn of a similar weight that will look good with your sock and use it.
Now knit 1" of ribbing in either your unraveled yarn or the matching yarn. Don't worry about kinks in the unraveled yarn. They will go away when you wash the cup holder. Bind off loosely in rib and ta-da! you have a cup holder. Here is the pair I made from those socks. They fit a Starbucks Grande and a Venti cup.
 If you don't have worn out socks, do not despair. Just take some left over sock yarn and knit yourself a sock leg without a foot and you have a cup holder.
It is a matter of preference whether you like the cup holder to cover the entire cup (as above) or leave some space at the top and bottom (as below). The lid will cover the lip of the cup but sometimes I like to take the lid off and drink. If you are like me, you will prefer the holder to be slightly smaller than the cup. The cup holder below fits a number of different cup sizes.
 You can practice a new stitch pattern (as I did) or make it plain with some ribbing. Your cup holder will keep the drink warm (or cold) and prevent condensation with cold drinks.
 You can also make ones that fit your water bottle to keep the condensation from dripping onto things.
Use your new eco-friendly (recycle, reuse) cup holder and water bottle cover in good health!
Subscribe to:
Posts (Atom)