The other full day class I took at Rhinebeck was on Navajo weaving. I have always been fascinated by rugs but not to the extent of learning how to knot them. The process of rug hooking doesn't interest me but weaving rugs does. I don't think I will become a rug weaver but making the occasional rug is definitely in the cards.
I had heard good things about the Navajo weaving class that was offered last year at Rhinebeck. So when it was on the list of workshops for this year, I signed up. It sold out pretty quickly but the teacher was willing to add another day so more people were able to take it. She vends at the festival so can only teach on Thursday and Friday.
The teacher is a member of the Navajo Nation and her whole family weaves. She showed us an example of her niece's weaving when she was a child as well as an adult. As a 5-year old, she made a striped rug. These rugs are all made from vertical and horizontal lines - which is all the patterning we learned in class. One can also make diagonals but a one-day class isn't sufficient to teach that also.


This one has some diagonal lines on it.

We started off with warped looms but we had to add the side warps to the loom. These are single strands of wool that hide the un-dyed warp on the sides. They are used to eventually make the tassels at the ends of the rugs. Once we did that, we created our two sheds. One shed is created by looping thread around a dowel and every other warp strand. The second shed is picked up with the beater behind the dowel shed.

Here you can see the loom set up with the two sheds. The dowel shed is kept up at the top except when used in weaving. Here you can see the second shed being created behind it. You can also see the edge of the rug in brown at the bottom.
We got 8 oz of yarn in any combination of colors we wanted. I picked relatively traditional colors - black, tan, natural and a red.
Once we had all this set up we started weaving. You weave with lengths of yarn and add on as needed. First we did an edging stripe in the same color as the edge yarn. Then we learned how to add another color. It is very similar to other weaving except that one is manipulating everything with one's fingers vs. using a shuttle. Adding in another color is how you do horizontal stripes.
After we had woven a stripe or two, we learned how to do vertical stripes. This is like tapestry weaving where you interlace the two colors every other weft pick (or row).
Since she demonstrated everything so quickly, I took videos of each step so I could refer back to them when I finish my rug.

This is the current state of my rug. You can see the black edging warp. I am making a cross like figure and adding in more colors as I widen the arms. I am not going to try and make it symmetrical as that requires not only measurement but accurate beating to make sure the same number of weft threads end up in the top as at the bottom.
The weft is beaten in with a tapestry beater. She lent us these tools for the class. I will use the metal hair pick I used when making my jeans rug along with a pickup stick to beat into a straight line periodically. One weaves this in sections and one can build up one side and then the other to compensate. However, at this time, I decided to stick to doing both at the same time due to my lack of experience in making them match!
As the rug get higher and higher and there is less room, one starts using narrower pickup sticks and then eventually a knitting needle or dowel to make the sheds. The dowel shed will have to come out also. One keeps packing the weft down as much as possible and eventually when there is no space left, one is done.
The finishing is simple, undo the twine that holds the rug to the loom on both top and bottom. Then take the ends of the edging warp and knot them together.

They can then be braided or twisted like a fringe.
I am designing on the go like the Navajo women do. Right now I have only vague ideas of how the rug will look.
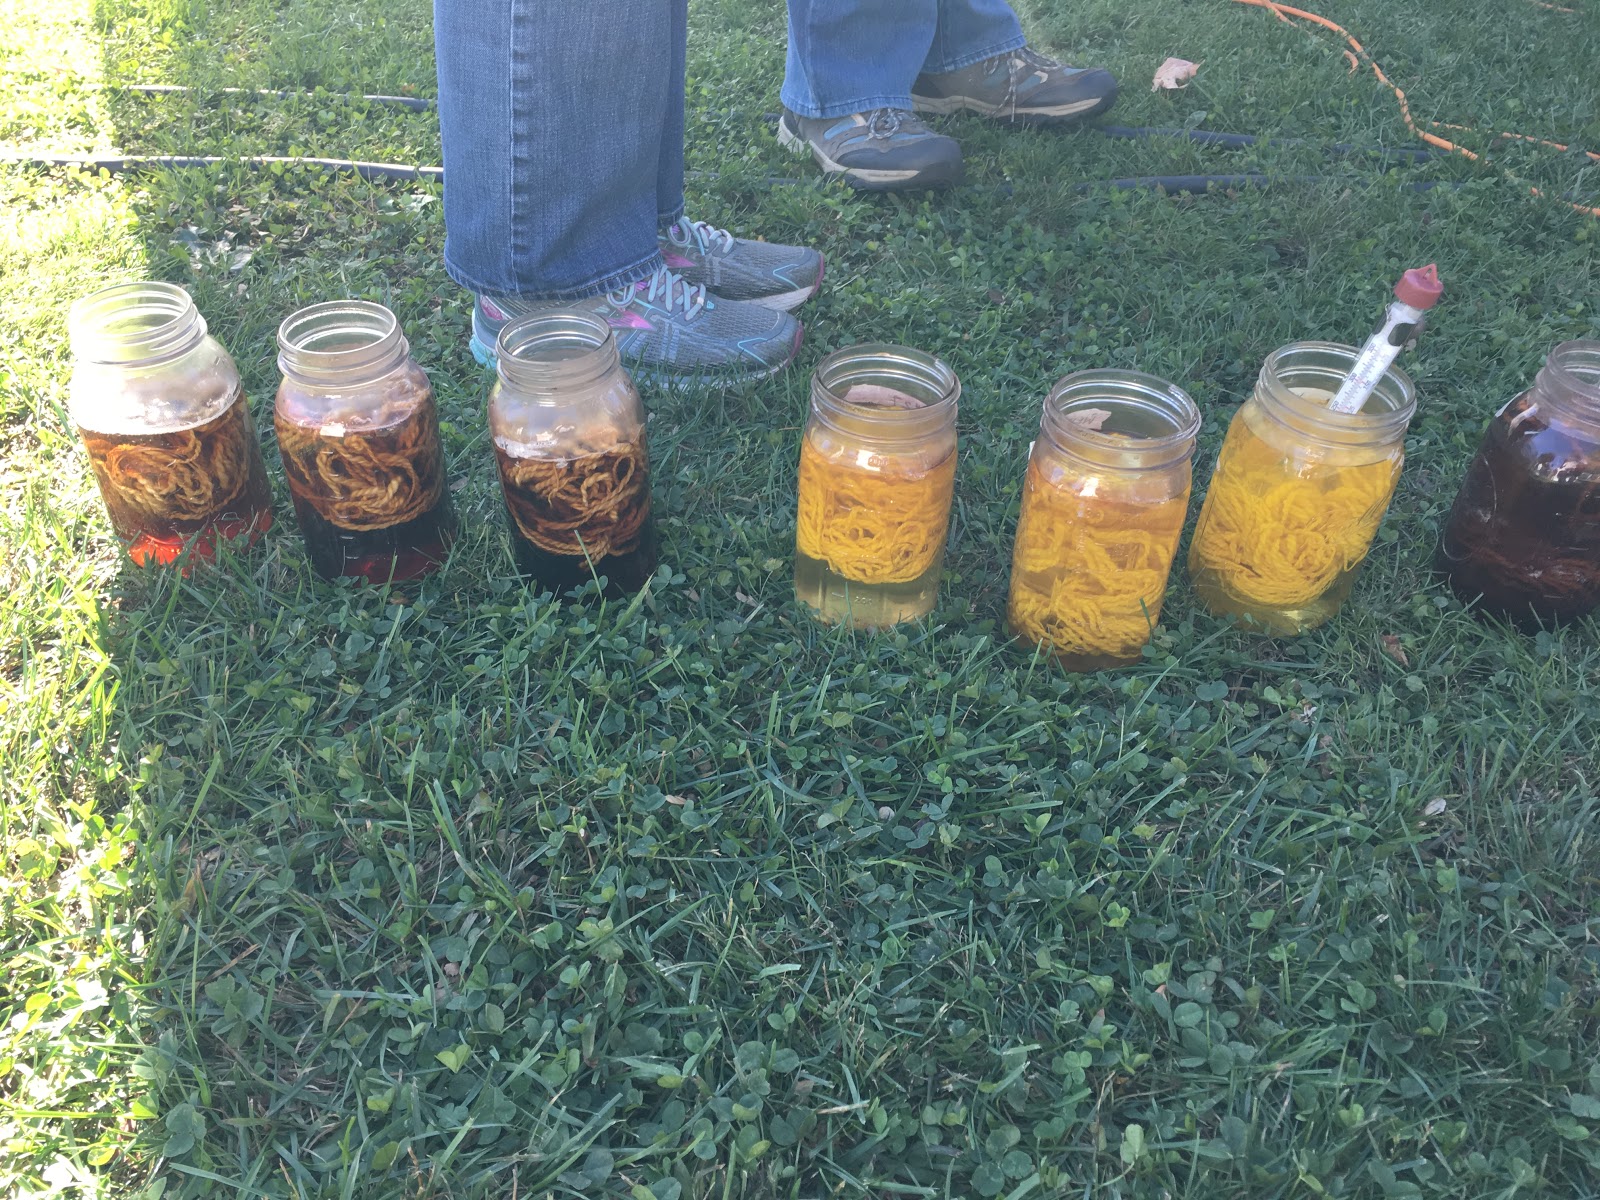
I spoke to a young Navajo man at the Painted Desert Inn in the Petrified Forest National Park in Arizona. His grandmother was weaving but she had gone out for a break and didn't return while we were there. He said that in his family, men don't weave. So he didn't show us how to do it. But he demonstrated how the wool is carded and spun using regular wool cards and Navajo spindles. His spinning wasn't that good either because he said he was just learning. It is a tightly spun woolen singles yarn which is dyed using natural dyes like cochineal, various woods (he gave us Navajo names so I don't know what they were), and plants. His grandmother had a rug on a larger frame than the one I am showing above but it was very similar.
He said that traditionally the warp was on two branches or dowels top and bottom. No sides. The top was attached to a tree branch where the women were tending their sheep. The bottom was pegged into the ground to tension the warp. When the sheep needed to move on, the loom was detached, rolled up and carried to the next spot. The entire process of carding and spinning and weaving was designed for a nomadic life, following the sheep.


The New Mexico State Capitol is an art gallery. It is free to come in and look at the hundreds of painting, mixed media art, weaving and sculpture that are featured in the corridors. It is weird to walk in among people who work there but that is the way it is designed to be viewed. I took photos of a number of the art pieces and have included the traditional Native American weavings here. Some are Navajo and others are by other tribes.
More on the state capitol when I talk about that trip. I also have photos from the Painted Desert Inn discussion but those are in the camera and I need to sort through them.
I had heard good things about the Navajo weaving class that was offered last year at Rhinebeck. So when it was on the list of workshops for this year, I signed up. It sold out pretty quickly but the teacher was willing to add another day so more people were able to take it. She vends at the festival so can only teach on Thursday and Friday.
The teacher is a member of the Navajo Nation and her whole family weaves. She showed us an example of her niece's weaving when she was a child as well as an adult. As a 5-year old, she made a striped rug. These rugs are all made from vertical and horizontal lines - which is all the patterning we learned in class. One can also make diagonals but a one-day class isn't sufficient to teach that also.


This one has some diagonal lines on it.

We started off with warped looms but we had to add the side warps to the loom. These are single strands of wool that hide the un-dyed warp on the sides. They are used to eventually make the tassels at the ends of the rugs. Once we did that, we created our two sheds. One shed is created by looping thread around a dowel and every other warp strand. The second shed is picked up with the beater behind the dowel shed.

Here you can see the loom set up with the two sheds. The dowel shed is kept up at the top except when used in weaving. Here you can see the second shed being created behind it. You can also see the edge of the rug in brown at the bottom.
We got 8 oz of yarn in any combination of colors we wanted. I picked relatively traditional colors - black, tan, natural and a red.
Once we had all this set up we started weaving. You weave with lengths of yarn and add on as needed. First we did an edging stripe in the same color as the edge yarn. Then we learned how to add another color. It is very similar to other weaving except that one is manipulating everything with one's fingers vs. using a shuttle. Adding in another color is how you do horizontal stripes.
After we had woven a stripe or two, we learned how to do vertical stripes. This is like tapestry weaving where you interlace the two colors every other weft pick (or row).
Since she demonstrated everything so quickly, I took videos of each step so I could refer back to them when I finish my rug.

This is the current state of my rug. You can see the black edging warp. I am making a cross like figure and adding in more colors as I widen the arms. I am not going to try and make it symmetrical as that requires not only measurement but accurate beating to make sure the same number of weft threads end up in the top as at the bottom.
The weft is beaten in with a tapestry beater. She lent us these tools for the class. I will use the metal hair pick I used when making my jeans rug along with a pickup stick to beat into a straight line periodically. One weaves this in sections and one can build up one side and then the other to compensate. However, at this time, I decided to stick to doing both at the same time due to my lack of experience in making them match!
As the rug get higher and higher and there is less room, one starts using narrower pickup sticks and then eventually a knitting needle or dowel to make the sheds. The dowel shed will have to come out also. One keeps packing the weft down as much as possible and eventually when there is no space left, one is done.
The finishing is simple, undo the twine that holds the rug to the loom on both top and bottom. Then take the ends of the edging warp and knot them together.

They can then be braided or twisted like a fringe.
I am designing on the go like the Navajo women do. Right now I have only vague ideas of how the rug will look.
I spoke to a young Navajo man at the Painted Desert Inn in the Petrified Forest National Park in Arizona. His grandmother was weaving but she had gone out for a break and didn't return while we were there. He said that in his family, men don't weave. So he didn't show us how to do it. But he demonstrated how the wool is carded and spun using regular wool cards and Navajo spindles. His spinning wasn't that good either because he said he was just learning. It is a tightly spun woolen singles yarn which is dyed using natural dyes like cochineal, various woods (he gave us Navajo names so I don't know what they were), and plants. His grandmother had a rug on a larger frame than the one I am showing above but it was very similar.
He said that traditionally the warp was on two branches or dowels top and bottom. No sides. The top was attached to a tree branch where the women were tending their sheep. The bottom was pegged into the ground to tension the warp. When the sheep needed to move on, the loom was detached, rolled up and carried to the next spot. The entire process of carding and spinning and weaving was designed for a nomadic life, following the sheep.


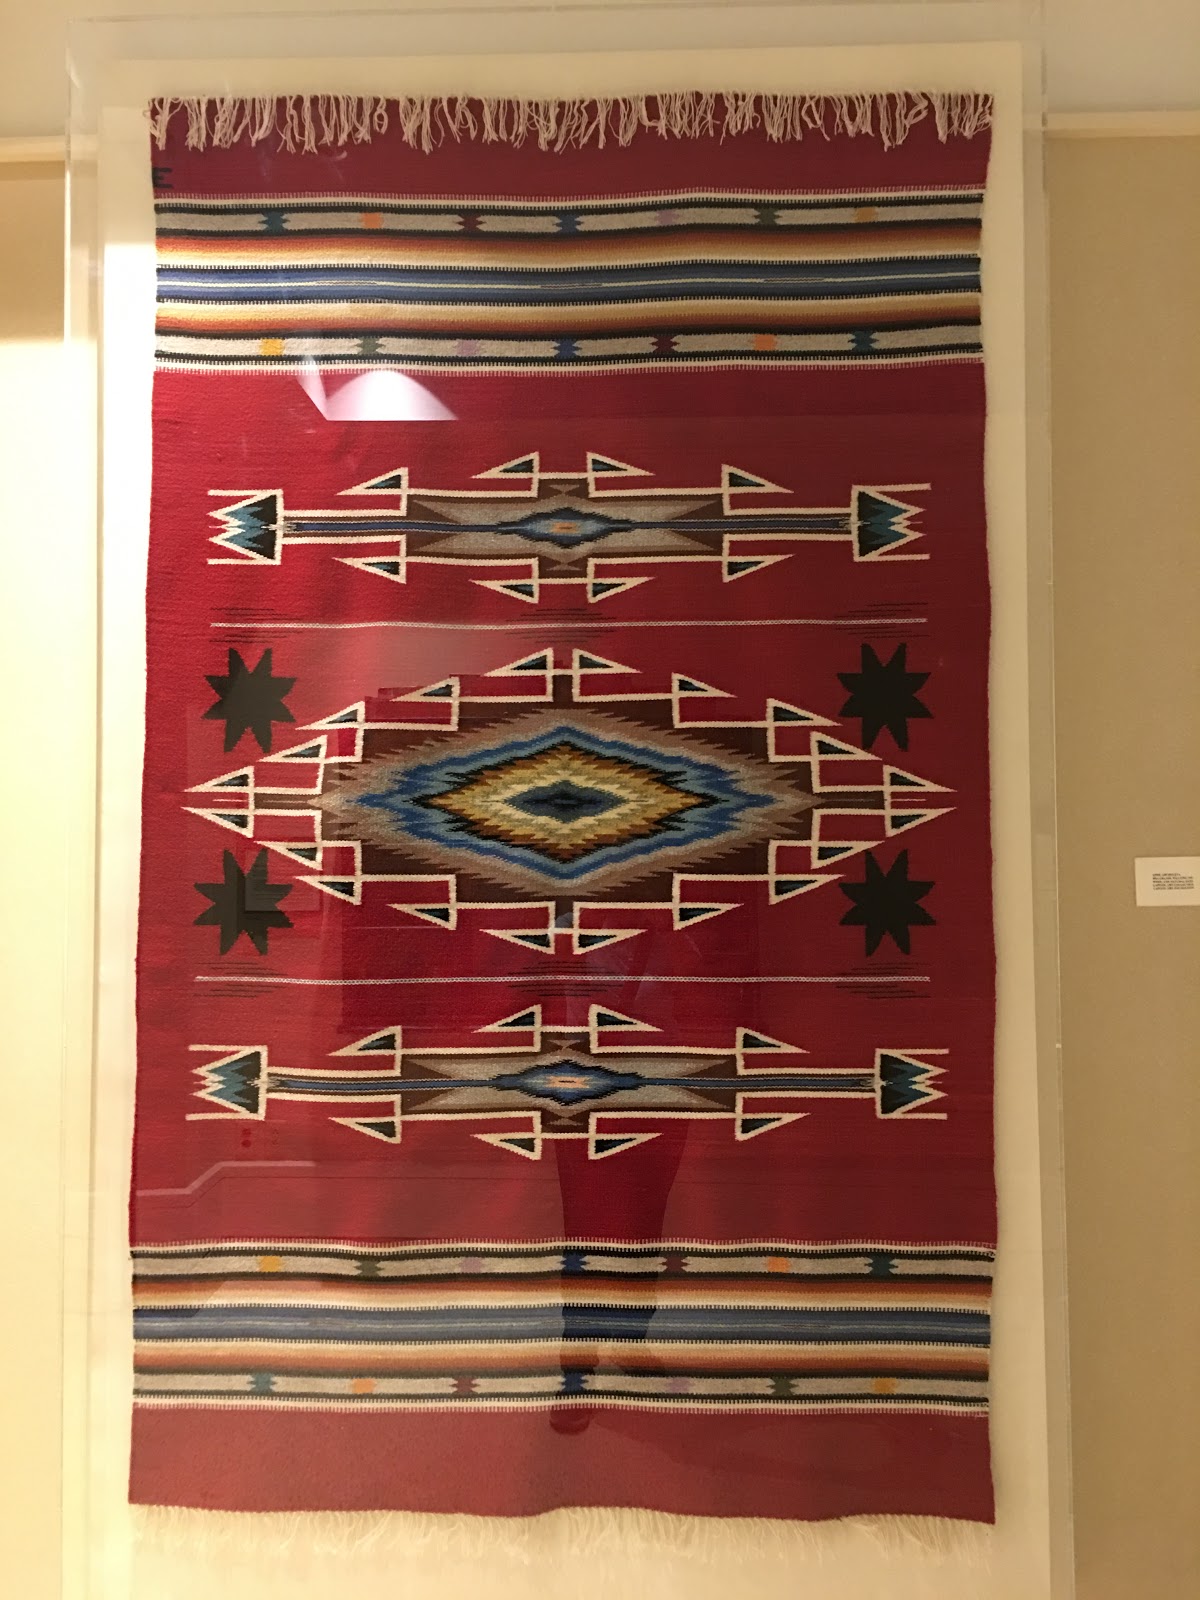


The New Mexico State Capitol is an art gallery. It is free to come in and look at the hundreds of painting, mixed media art, weaving and sculpture that are featured in the corridors. It is weird to walk in among people who work there but that is the way it is designed to be viewed. I took photos of a number of the art pieces and have included the traditional Native American weavings here. Some are Navajo and others are by other tribes.
More on the state capitol when I talk about that trip. I also have photos from the Painted Desert Inn discussion but those are in the camera and I need to sort through them.