Showing posts with label tip. Show all posts

Friday, August 11, 2017

At Judith MacKenzie's feet - Part 2

After the camel top, we moved on to silk. I was especially interested in this as I have some silk at home and I have been afraid to spin it. We covered silk caps/hankies, silk bricks and silk top. I wasn't quick enough to score some of the lovely Red Eri silk top Judith had for sale so I had to be content with admiring other people's spinning.

Judith believes that silk top must be spun worsted. Sara Lamb, in her Spinning Silk video from Interweave spins over the fold. Sara's point is that she spins a lot of silk and if she spun it short forward draw, her hands wouldn't survive the process. Judith gave us some statistics about fibers and how many times they can be bent/straightened or folded before they give way. I don't remember all the numbers but wool can tolerate this many tens of thousands of times. These are just to give you orders of magnitude, not exact numbers. Cotton and Tencel fall in the middle with tolerances in the few thousands. Silk has the lowest tolerance. The implication here is that the yarn will not be as durable because as you knit or crochet, and as you use the item, the folded silk fibers (from spinning over the fold) will flex and straighten and eventually give way. It was an interesting perspective and as most of us are not spinning for heirloom items, it may not be a big deal. 

Silk also will stick to almost any surface. Human skin and other silk are two exceptions. She recommended that we wrap the fiber in a silk scarf and hold it within the scarf and spin from the end peeking out. During the class, one of the members held a silk hankie in his fiber hand and spun silk. I didn't have any silk with me so I held it loosely in my hand and spun it quite successfully. The tip from the worsted spinning the day before helped me a lot.
The thread on the bobbin core is what I spun. The rest is the silk she gave us to spin. I spun a very fine Corriedale when I first got a support spindle and I thought it might be nice to ply a fine silk yarn to ply with it. That bleached tussah in the bottom is for that purpose. I don't have much yardage in the Corriedale but there should be enough for a cowl. The rest is honey tussah. I showed Judith my singles and she thought I could add some more twist to it. I was pleased that I didn't have a lot of lumps and bumps and also didn't have to pull off any messed up fiber. The messed up silk is good for carding and blending. 

We also discussed spinning embroidery thread. The key here is that it should be 2-ply, it should have a lot of twist and it needs to be fine. The 2-ply is so that there is a 'bite ' to the yarn so it stays put on the fabric. A 3-ply is a round yarn and is more likely to slip and slide on the fabric. Once the yarn is plied, it should have an even twist so that it doesn't snag. Judith paid for her first wheel by spinning embroidery floss and selling it in 10-yd lengths. I think I have some spindle-spun yarn that might qualify for embroidery thread in diameter if not in quality.

We also discussed silk caps. These are like silk hankies except that hankies are cocoons spread out on a square frame and a cap is stretched out over a cap-shaped form. Judith tried to demonstrate how she stretches out the cap on her swift. She puts it on the top, secures the ends around the spokes - you just have to stretch them to fit evenly on the spokes, they will stay put, and then she opens the swift to stretch the cap. However, the swift we had in class did not cooperate because it opened in a different way. So she ended up stretching it with her hands. She then broke off an end and started drafting. The important part to remember here is that you can't draft once you get some twist into the silk fibers because we are looking at a set of single long fibers. So draft the silk out to an approximation of the thickness you want. 

Judith just wound the drafted silk around her hand and also put it in a pile in the floor. One of the class students showed us what happens when you wrap the silk tightly on a card for future spinning. It melts into itself and you have to start over with the drafting. The moral of the story is spin it soon after drafting and maybe put the drafted fiber in a pile in a paper bag or bowl.

A silk brick is a very tightly compressed piece of silk fiber. You have to find the end and open it up. It is wound up and compressed while it is still wet. So the top layer of fiber won't draft properly and needs to be discarded. It is wrinkly and doesn't look much like silk. Judith's experience is that it won't straighten out even if you wet and stretch it. She recommended that it be used for blending or carding where you want some texture. After that removing that section, the rest of the brick is spun just like top.

We moved on to dyeing. Judith had asked us to bring items to dye in an indigo bath and many students had brought shirts, pants, yarn, etc. It was a revelation to me that I could dye these types of items in an indigo bath. Indigo will dye almost anything. One student knit a sweater in an orange-y yarn and it looked gorgeous after dyeing. She also dyed a neon poly-cotton T-shirt which turned a nice bright shade of green. 

The bath was created with the same pre-reduced indigo that I had used at Rhinebeck. But this time, one of the epiphanies from the class is that I don't have to keep an indigo pot going for a long time. Judith showed us how we can make a dye-pot, dye items till the dye is exhausted and then be done with it. The class included a silk scarf for dyeing but Judith had also brought things she had found in thrift shops. One of her finds was a large number of 100% linen T-shirts that were labeled 4XL but weren't anywhere close to that size. They were more like a women's large. She had dyed some of them with tea and some with tea and cochineal. We were welcome to as many as we wanted once everyone had a chance to get one at a cost of $5 which was Judith's cost. I took 2 - a tea dyed one and a white one. I also dyed 2 hand-stitched napkins. I am now going to be haunting my local Goodwill store. 

I was a bit taken aback by the additional items to dye so I didn't plan my dyeing very well. I should have tied the tea dyed T-shirt before putting in the dye-bath. As it turned out, both T-shirts ended up with a very similar color. I dipped each shirt twice, one day apart. The first T-shirt is pretty evenly dyed with a bit of a kettle-dyed look. I decided to tie the second T-shirt after its first bath as it was really splotchy and I didn't like the splotches. I rolled it diagonally and tied it. You can see the faint diagonal lines on the front and the more pronounced ones in the back.

 I decided to tie-dye the silk scarf but I didn't have anything except thread to tie it. No clamps or blocks like I had at Rhinebeck. I just folded it in half lengthwise, pleated it and tied it in 3 places around the pleats. I really like the result. It has a damask design on it so the white parts are not completely plain.
 These are the two napkins. All the items were dipped concurrently and sequentially in the same 3 pots so there were a number of items in each dye pot. That accounts for the lines and uneven dyeing. These were a pale pink damask before I started on them. I like the result. They look used.
 I also dipped my camel skein and the skein I spun to sample the custom Manx Loaghtan blend I got at the class. The camel is on the right and the other one is one the right. I like the effect of indigo on camel.

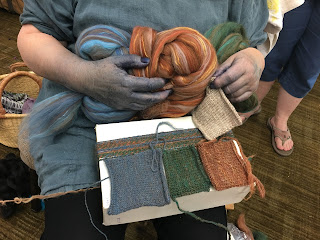
To make the dye pot, we filled the pot with water just warm to the hand. Indigo needs to be between 90 and 140F. It will not dye once it goes above 140 but you don't have to go that high. The temperature felt as if it was slightly warmer than I would use for adding a yogurt starter to milk. Then Judith mixed the dye crystals with warm water in a mason jar and stirred to dissolve. It should be a lovely green color below the surface. Judith uses small amounts of Rit dye remover instead of Thiox to remove the oxygen in the water. She just sprinkles a little bit into the jar. Once the crystals are dissolved, she slowly adds the dye to the warm water. She didn't measure anything. She said that a pot like this doesn't require as much care as a pot that one will keep for a long time - adding Thiox every week and making sure the ph is correct. The Rit dye remover is toxic but the quantities are so small that she felt it was OK for a pot that will be exhausted in the day.

Indigo will only deposit in an absence of oxygen. So stirring, adding and removing items from the pot needs to be done with care. Items need to be lowered gently into the pot and must be removed from the side so they don't drip into the pot. Bubbles of air introduce oxygen which causes the indigo to morph out of the form in which it will deposit. 

Once the dye is added to the pot, Judith adds another sprinkle of the dye remover and then we let the pot sit for about 10-15 mins. Then she puts in a drop of Dawn dish detergent into the pot. This causes the indigo particles that have formed a scum on the surface to move out of the way and the items can be submerged without worrying about getting these particles on the item. The scum is the indigo that has been exposed to the air on top of the dye-pot. In a long-running bath, this *flower* seals the surface and prevents oxygen from getting into the dye solution. It is removed and saved, and then replaced when one is done dyeing for the day. But in a temporary, one-time pot, it doesn't build up enough to become a flower.

Judith added as many items as would fit. A few big items that needed a lot of dye and then some of the smaller items to fill out the pot. Items are left in there for about 20-30 mins with some stirring periodically during that interval. Then the items are removed and are not squeezed as they come out. You want the dye to remain on the fabric. We took the wet items and waved them around, aerating all the surfaces to cause the indigo reaction. If you haven't seen indigo dyeing, the items come out of the dye pot a green color. This is the un-oxygenated version of indigo. When it is exposed to air, it turns blue and deposits on the surface. This is why you don't squeeze the dye out of the item. 

After aerating them for a while, we spread them out on tarps or on the grass and flipped them around every 10 mins or so to continue the aerating process. The indigo will continue to deposit and harden over a period of time. According to one of the experts Judith quoted, the longer you leave the indigo on the item before you rinse it, the longer the color will last. I haven't rinsed any of my items yet. They need to be rinsed till the water runs clear and then ironed.

I am much more confident of making a one-day temporary pot in which I can dye a number of items and then exhausting it. The bath can be refreshed with more dye dissolved in the mason jar as the day progresses. When the dye concentration comes down, you can re-dye things or use the dye to do a light wash of color on other items. Indigo should be the last dye on the fabric as it doesn't penetrate and bond but sits on the surface of the item. You can dye with acid or natural dyes before you dye with indigo.

I found this article at Earth Guild on one-time dyeing. It also clarified a few things for me as I saw the difference between a one-time pot and a multi-use pot.

We dyed on two days. Some items went in twice and some went in once. The dye pots were a pale blue when we dumped them. If one uses Thiox, one has to add vinegar to neutralize the ph before the pot is emptied. In this case, we used so little Rit dye remover (maybe a tsp per dye pot?) that it didn't affect the ph too much.

One item that was relevant to me was the process of estimating the yardage of yarn needed for a project like a sweater. 
  1. Spin s sample yarn and knit a swatch. Repeat this process till you have a swatch you like. Remember that changing needle sizes will change the fabric so experiment with 2-3 needle sizes for each yarn. It should be a decent sized swatch. Once you have a swatch you like, proceed with step 2. 
  2. Use a yarn balance to get the yards/lb (YPP) of your yarn
  3. Weigh your swatch
  4. Calculate the area of your swatch. 
  5. Divide your project into a series of shapes and estimate the area of each shape. This is easier if you have a schematic. For example, a sleeve is a rectangle with two triangles on either side of it. 
  6. Divide the area of your project by the area of your swatch to calculate how many swatches there are in your project (this is needed to get the approximate weight of the whole project). If you have 20 swatches in your project, the weight of the project will be 20x the weight of the swatch.
  7. Use the YPP number to calculate the yardage needed for that weight which will give you the yardage you need. Obviously, this is an estimate, so add at least 20% contingency to this number.
Some of the students in the class spun and knit swatches using the dyed and undyed versions of the Merino/Shetland/Manx Loaghtan/silk from The Homestead Hobbyist. She showed us how these all go together because they are dyed on the same base. You can see the fiber and the swatches here.


We also learned to card and comb using Judith's Dutch combs and electric drum carder.  I didn't make any batts but others did. 

Judith also brought us items of clothing that she found in thrift shops and the first person it fit got the item. These were beautifully made dresses and shirts in natural fabrics. I got a dark blue linen short sleeved shirt that I used as a smock when we dyed! 

All in all, it was a very inspirational, educational, relaxing, and enjoyable workshop.

Monday, August 7, 2017

At Judith MacKenzie's feet - Part 1

I had the opportunity and privilege to take 4 days of classes with Judith MacKenzie last week. It was amazing. The woman really knows everything there is to know about spinning, fibers and weaving. This was a spinning workshop but we discussed using handspun in weaving.

We started off by making marled yarns. A marled yarn is one that has 2 or more colors in the yarn. A ragg yarn is an example of a marled yarn that has 2 colors. To create these marled yarns, 1 held 3 colors together, parallel to each other. Assuming ! started at the left, they would be color 1, 2 and 3 from left to right. I could start on either side but in our example, 1 started spinning on the left side of color 1 and spun across the width of the fiber. When 1 came to the right side of fiber 1, I continued across the join, spinning a bit from color 1 and from color 2 at the same time. This blends the join. Then I moved across to color 2 and spun across its width. At the join with color 3, I spun again from both and then across color 3.

At this point, there are a few options:

  1. Spin back across all 3 colors and keep going back and forth
  2. Add a 4th color and drop color 1. Judith recommends being consistent in where one adds and removes colors.
  3. Spin back across some of the colors but not all of color 1, 2. 3
I tried a little bit of each, but holding 3 colors was not comfortable. So I tried holding 2 and 1. The issue with holding 1 is that you don't get enough of the transition of blended color. I also tried holding one, then holding two during the transition, and then dropping the first color. I ended up dropping a lot of colors on the floor! I also found it difficult to be consistent in the add/remove direction. I think a written plan and a place to keep the various colors in order close by would help.

Once you have the singles made this way, you can 2-ply, 3-ply or do other things with them. Some of the people in the workshop made traditional 3 plies. I decided to make a cabled yarn because the colors come out as dots when you do that. I used bright colors for my first attempt. Judith recommended knitting samples with one's spinning - something I rarely do until it is time to actually make something. The purpose of the class was to learn to 'spin for a purpose' so sampling makes sense in this context.
 These were my attempts in class. The long narrow swatch in the middle was done with 2 different needle sizes - a US 3 and a US 4.  That was my first attempt. The top swatch was the second and I'll discuss it further below. The skein was my third attempt. It isn't finished so is a bit squirrelly still. Judith's critique was that I am adding too much plying twist so the yarn is hard and dense.

For my second swatch, I combed 3 colors together and dizzed them off to create 3 similar nests. They weren't all the same as a class mate added some silk to one and I didn't actually plan the colors. I had 3 and I randomly added some of each to each section of top. Then Susan of Abstract Fiber gave me a sample of her Targhee/silk/bamboo to spin. I added that to the bobbin and plied and cabled the singles. The green/yellow colors in the swatch are from her sample. The rest are Ashland Bay standard colors in their merino top.

As you can see, blending the solids creates a more even color palette without the pops of color that come from the marled yarn. Now, I chose to use a bright pink which dominates my marled yarn but that was because I wanted to see what it would look like. I used less of it in the skein and combined it with some more muted colors. In the swatch, there are 2 brights and they clash - a yellow and the pink.

I picked out the two solid colors because one can use them as contrast solid stripes in a piece. Cabled yarns are very durable and make good socks yarns as the yarn is rounded and very smooth. Plus the pops of color are interesting. The marling can be adjusted to create self striping yarns for any diameter item. Longer repeats for sweaters and hats, shorter repeats for mitts and socks.

This was fun! I have some solid colors from other classes at home. I brought home bits and put them all in a bag. I plan to have fun playing with samples this winter using those.

One of the challenges with spinning this way is that you need to be able to evenly spin across a width of top without it all getting tangled up and uneven. I am pretty good at this but not perfect. I realized that when I was spinning the 2 red braids together. Therefore, I decided to pick Judith's brain and took my top to her to explain the problem and ask what I was doing wrong. My top tends to split into an upper and lower layer and I find it hard to integrate the two.

She took one look at the piece of fiber and spread it out so there was no folding. The spinning edge was U-shaped and she immediately told me what I was doing wrong. In order to spin evenly across the edge of a combed top, one spins in one place for a while and then moves to the right or left by slightly angling the remaining fiber or the drafting triangle or both. This picks up neighboring fibers and slowly moves in the opposite direction from the tilt. I was not spinning long enough in one spot. One should spin till the staple in that spot is exhausted and then move. This was especially true at the ends, because one gets to the end, spins the current staple and then has to drop down to the next level before going back. I wasn't doing this. That is why my edge was U-shaped.

I went back and tried what she said and voila! I no longer had the problem. I can't wait to try this on the red braids. I had lots of opportunity to practice this during the workshop so I'll come back to it later.

Next up, we were introduced to camel top. Judith showed us various ways to spin it and one way she recommended we didn't spin it. That last way was an attentuated long draw as is done for cotton. It takes too much air out of the yarn and creates a dense yarn that reduces the softness of the camel.

For a change, I went back and created a sample card with all the different ways of spinning it. Actually, it is two cards. The left side is 3-plies and the right side is 2-plies. These are all plied back on themselves so sometimes there isn't enough plying twist. Woolen yarns have less spinning twist and more plying twist to make them stable. That is what traps air in them.  So some of the ply-back samples don't have enough twist. Judith adds twist by rolling them on her thigh but I haven't mastered this technique. I tried it but after discussing it with her, I don't think I was pressing hard enough when I rolled.

I also made a little skein of the semi-worsted draw which I plied in the normal way. I ended up putting it in the indigo dye-pot so I'll show it to you when I discuss that.

I bought some fiber from The Homestead Hobbyist.
 I spun some of this in class and it also ended up in the dye-pot. So you'll see it later. I flew to this workshop and I love traveling light. So I didn't take any fiber with me and that is why I had to start spinning this right away!

 I haven't told you this yet, but I have some cotton spinning in my future. Details at a later date. I bought some of this to try.

I don't know what I'll do with this but I think I will spin it and then dye it. Let's see.

I also got some camel from Judith. I think I will end up spinning this from the fold. I love spinning camel top worsted but it isn't the best way to spin such a lovely airy fiber. The semi-worsted way I spun the small skein wasn't as even as I would like. That involved letting twist between the hands but drafting forward short distances. I have some more downs at home and I am more confident about spinning them now.

I'll stop here for now and continue with the rest of the class in the next post. It might be this week.

I decided my sweater was not a good travel project so I took one of my handspun skeins and a simple pattern with me on the trip. I managed to finish it between the two travel days and some knitting in class while listening to Judith. I needed to take a break from spinning to rest my hands.
 That was the wound ball before I left.

This is what it is now. I love it. It is too hot to wear though. It is on the window sill where I can admire it. I call it my Superb Starling shawl because it reminds me of a Superb Starling.


Tuesday, May 30, 2017

Waffling about color order

I finished the blanket and it has turned out very well. I am quite happy with it in all respects except for the fact that I have a decent amount of the bulky Lopi-like yarn left! I may be able to make a shawl or even a small rug with the remnants. Oh well. At least there is less.


That is how much is left. I need to weigh each color so I know approximately how much yardage there is. There is one full skein of the magenta.

The blanket panels are joined by linking the loops on the sides. One loop from one panel is pulled through the corresponding loop on the other panel. Then you alternate that up the sides of the panels. The last loop is secured by pulling part of the fringe through it. When the fringe is knotted, the loop is secure. It is an easy way to join. In the photo above I had just finished joining the three panels. It goes fast.

 This is a closeup of the join before finishing.
 After washing, the join flattens out. I fulled the blanket because it was a loosely spun yarn. As you all know, Lopi-like yarns full very easily. One trip through the handwash cycle on the washing machine and it is a nice fabric. This is one side of the join.

 This is the other.

The fringe took forever. I thought I could twist it with my fringe twister but with 90 ends on each panel, I had to pick either 2 or 3 ends in each fringe section. 5 is the other factor of 90 and I thought 5 was too big a number for twisting or braiding as this is bulky yarn. I decided on 3 and thought I could make a nice 3 ply twisted fringe. But it wasn't working. I have no idea why. Instead of wasting time trying to figure out the problem, I decided to just braid the fringe. Since it was knotted in 3's, that was easy. Except that a couple of the ends had frayed and come apart. I had to secure those by adding a neighboring end to strengthen it. So some sections are 4 ends.  So much for my exact mathematics!

It took 30 mins per panel end to braid and knot the bottom of the fringe. I didn't time the removal of the waste yarn and the knotting of the fringe at the top but that was a lot less per section.

I also used a technique I learned from one of the videos I have. Instead of knotting 3 (or however many) adjacent ends together, which leaves a portion of the weft exposed, one exchanges ends between groups so that they cross after the weft and that prevents those little gaps between fringe groups. To do this with an example:
First group: Ends 1, 2, 4 (3 and 4 change groups)
Second group: Ends 3, 5, 7 (6 and 7 change groups)
Third group: Ends 6, 8, 10 (9 and 10 change groups)
Fourth group: Ends 10, 11, 13 (12 and 13 change groups)
etc.
This is the finished blanket on a queen sized bed. It looks much nicer after finishing. I am going to cut the knots off the fringe as the braids are fulled and shouldn't come apart. I am just wondering if I should send it through the wash one more time. I can still separate the warp and the weft if I push with my finger. One of the finishing videos I watched says that woolen spun yarn should be fulled till the warp and the weft become a single cohesive fabric. I haven't decided whether to wash it one more time or not.

I started Grapevine. As usual, I have to increase the depth to the armhole. I don't know why but every pattern i've followed has about a 7" depth to the armhole. I feel that is too tight and I feel constrained in moving my arms. I guess I just have wide shoulders and a bigger upper arm.
I have about 18 more rounds to the sleeve/body separation.

Now on to the waffling.

The rigid heddle weaving group in Ravelry has a monthly theme for weave-alongs. It is good because it gives you ideas and allows you to explore new things. The rag rug resulted from April's Weave with Fabric theme.  June's theme is Weave a Color Gamp.  A color gamp is a way to explore how colors interact with each other. You warp with a set of colors and then weave with the same colors in the same order. But the weft pattern can be different - different widths of color, interspersed with other colors, etc.

Since I am weaving to use up my stash in useful ways, I picked a selection of Shetland jumperweight yarns that weren't earmarked for a fair-isle project. I am having real difficulty deciding the order of the colors.
 I also decided to look at the values. Sequence C has them in a gradual color shifting order where I am picking up the tweed colors in the next yarn. Sequence D has them more in an alternating value order with the higher value yarns more evenly spread across the warp.
I am still in 2 minds about which one to warp. I only have 1 ball each of the gold and the green so I was happy to see that there is enough in one ball of each color to do a scarf. I have 1 extra ball of the blue and the rest are the duller colors in the sequence except for the burgundy. I have a lot of that.

I think I will do a color in weave pattern sampler with the remaining yarn exploring how patterns look when you alternate light and dark colors. Here is one example.

But first I have to decide on the order for the gamp. 

Thursday, May 11, 2017

No current WIPs!

I just finished the zippered hoodie. It is soaking prior to being blocked. And I finished the sock yarn spin yesterday. Nothing on the loom. It is sort of weird to be starting so many new projects. I am a monogamous crafter in general. I have a travel knitting project that I only work on when traveling. It is a lightweight yarn and a lace pattern that is not too complex. But otherwise, it is one project at a time.

I do have a spindle spinning project that is a WIP. I may pick it up again. I've been very focused on the minispinner for a while now. Anyway, I am in no hurry to start spinning something new. I have things I want to accomplish on the loom and in knitting and the garden work is in full swing.

Allergies have been keeping me indoors which is why I am being so productive. I hope the trees will be done with their flowering soon and then I can go out and work. The weeds have been given a boost by the rain and cool weather.

 The first two bobbins of the sock yarn were rather boring. There were a few spots here and there that were not blue or white. The objective here was to spin 3 low-twist single and then ply them higher-twist. It was a bit boring to do low-twist as one has to be careful to add enough twist to keep the singles together.  It requires attention and concentration. I watched some Patsy Z spinning videos to entertain me along with a couple of Tom Knisely's weaving videos.


The third singles had all the color. The braid had the bright color in one section so I divided it lengthwise into 3 instead of stripping the width into thirds. It was more fun spinning the third singles.
 There are the three of them lined up. They look like they have the same amount of singles on them, right? Wrong! The colored one on the right ran out first. I must have either added more twist to it or spun it slightly thicker.

My normal solution to running out of yarn on one bobbin in a 3-ply is to make a plying bracelet from the bobbin with the most yarn left and continue spinning a 3-ply. But when I tried to do that with the bobbin on the left which had the most yarn, I had major problems. The singles kept drifting apart. I tried a few times to restart but it was futile. I didn't realize the problem then or I could have fixed it a different way. Anyway, I chose to just make a 2-ply with the 2 bobbins.

Then I ran out of singles on the middle bobbin. Now I had to do something with the left bobbin as it still had a good bit of singles on it. I went back to the plying bracelet and had the same problem. The light bulb finally went on! Winding the plying bracelet was removing twist from the singles.  Since these were low-twist singles, enough was being removed that I no longer had sufficient twist to keep the yarn together. Twist is glue. I had no glue!

Once I realized that, I decided to just run that bobbin through the wheel again and add twist. It fell apart a few times, which made me realize that I had added a little too little twist to this bobbin, unlike the other two. But I managed to finish it, make a plying bracelet, and plied it back on itself. It fell apart towards the end and I gave up.

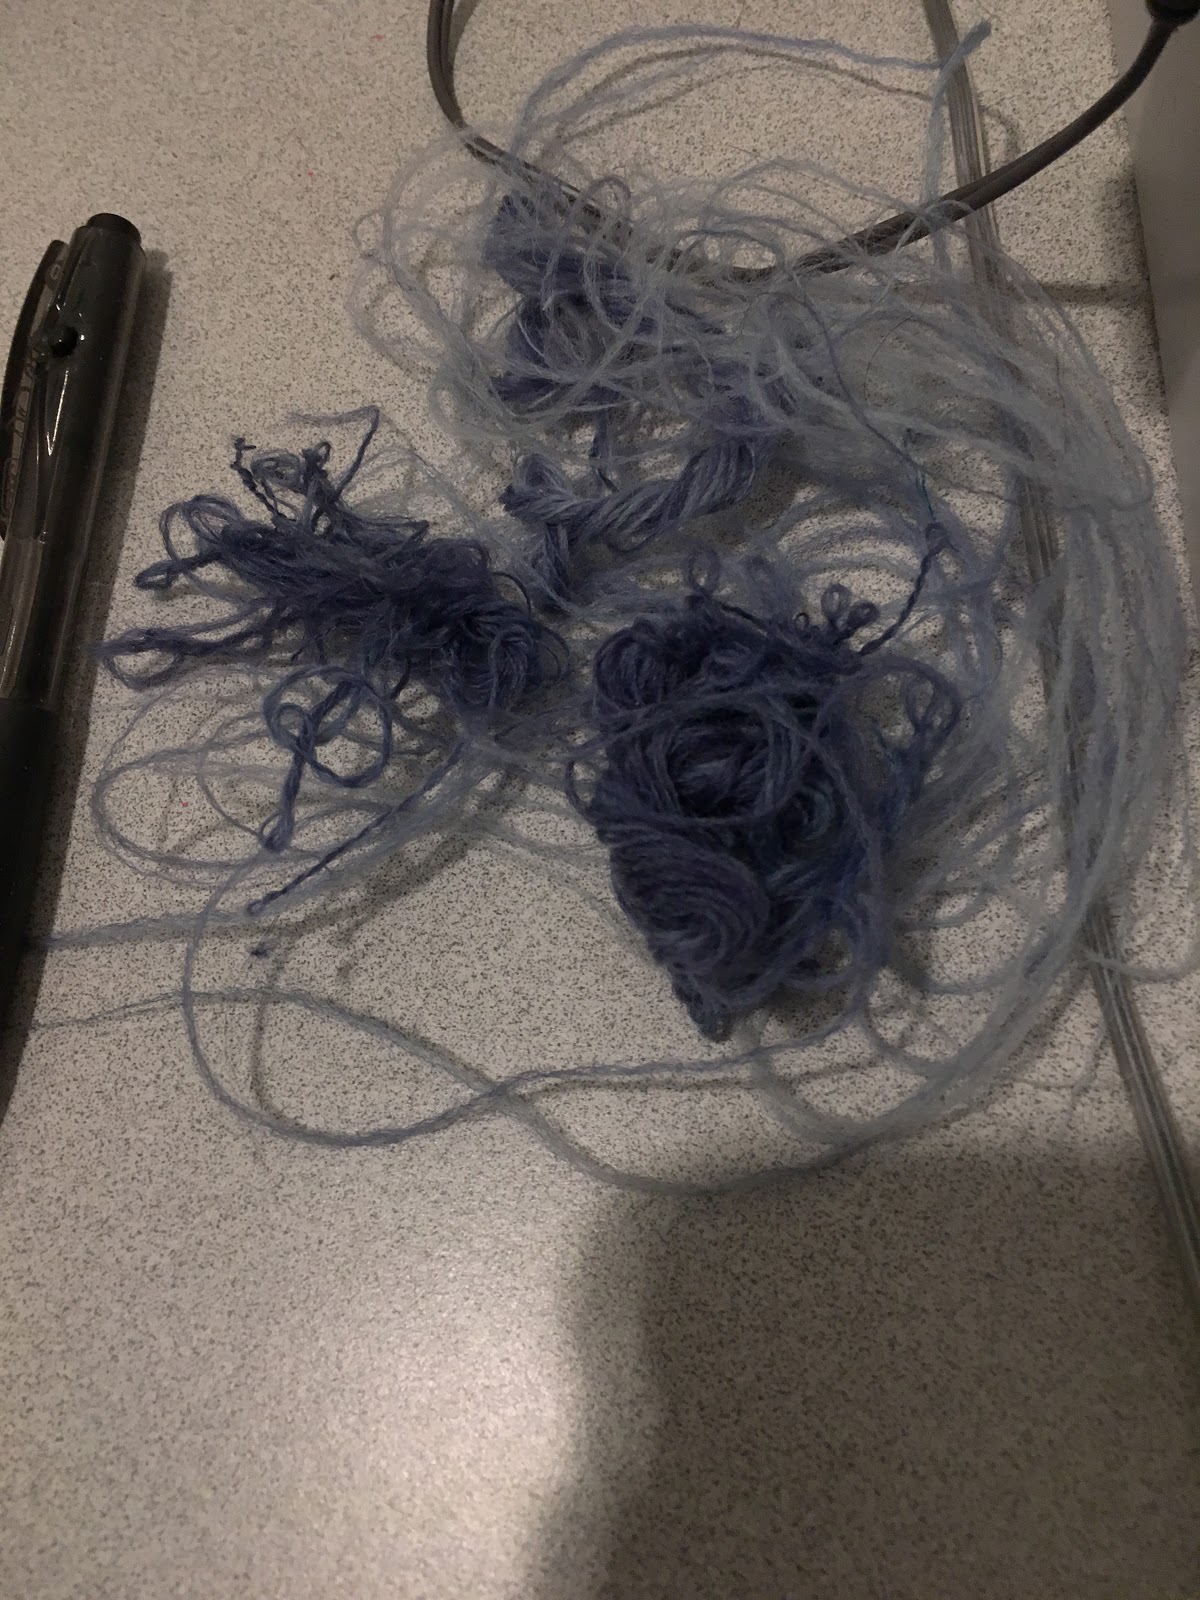
 Here's the pathetic little bundle of lost fibers with a pen on the side for context. I am a bit bummed. I have some nice 3-ply and two smaller bits of 2-ply. I don't know yet if I have enough yardage in the 3-ply for socks. If not, I'll make a shawl.

I think I went a little too thin and too low-twist on this. Looking at the final yarn, I could have easily drafted thicker. It is a light fingering weight, not a true sock yarn. Photos are forthcoming after it has dried. I might do a quick update tomorrow with just photos if everything dries.

On to the zippered Calmer hoodie. I extended the pockets and the body by 2" and then joined the bottoms of the pockets to the body and did an i-cord BO. It was rolling and I'm hoping blocking will stop that. Otherwise, I will have to do another attached i-cord to make a speed bump - as Meg Swansen says. Attached i-cord is not my favorite thing. So here's hoping it will stay flat.

I decided to finish the pockets before I did the sleeves in case there were problems and I had to rip stuff out. In a way it was good. Finishing as you go along means less finishing at the end. The pockets came out well except where they separate from the body. I was very concerned about that stress being put on 2 sts - one that remained with the body and one that became the pocket - right next to each other. I strengthened that section from the back by duplicate stitching across two rows and about 5-6 sts on each row at that point. I feel better about it now. This is my first time doing an angled pocket like this. I have to think about how I can reinforce that part while knitting.

That is the body with the pickets finished. I did a sort of duplicate st to join that straight end where I lengthened the pockets. It was putting an edge on top of a flat stockinette surface so I duplicate stitched over the edge and the corresponding column of sts on the body. I think it came out quite well.

After that I did the sleeves. I decided to do them on dpns because knitting on dpns is faster for me. However, I picked up the US size 7 dpns (4.5 mm) vs. the US size 8 I had used for the body! I didn't realize this till I finished the second sleeve. I tried on the sleeves as I knit to make sure they fit well so the fit is not an issue. It is that I have a bit more dense sleeves and used up more yarn and knit more sts than I needed to.

I had a lot of sts at the top of the sleeve so I made a little gusset there. I like this and will do it again in the future.

First sleeve done.

I didn't take a photo after the second sleeve. Here is the completed sweater, pre-zipper and blocking. I had to buy the zipper online because the local fabric store didn't have a separating zipper in the 20" size that was even remotely the same color. I am pretty happy with the match. The exact match was a custom order and I had to buy 25 in order to get it. This was the closest in-stock color they had. Not bad at all. https://www.zipperstop.com/ is the source. I paid more in shipping than the zipper cost but it wasn't much and it was easier to get it that way than go driving around looking for matches.

I am very pleased with the hood. I don't like the pointy hoods that most patterns have. I liked the shaping on Rogue, but it is in Aran weight. Also some of the completed garments had a bit of a gather at the top of the hood. So I took that shaping, modified it for the DK weight, and then changed it up a bit to make this hood. I think it will block out smooth. It fits well. Again, I am hoping the i-cord will stop rolling once it is blocked.

I found a whole bunch of bulky Lopi in the stash. I think there is enough to make a 3-panel blanket on the rigid heddle loom.

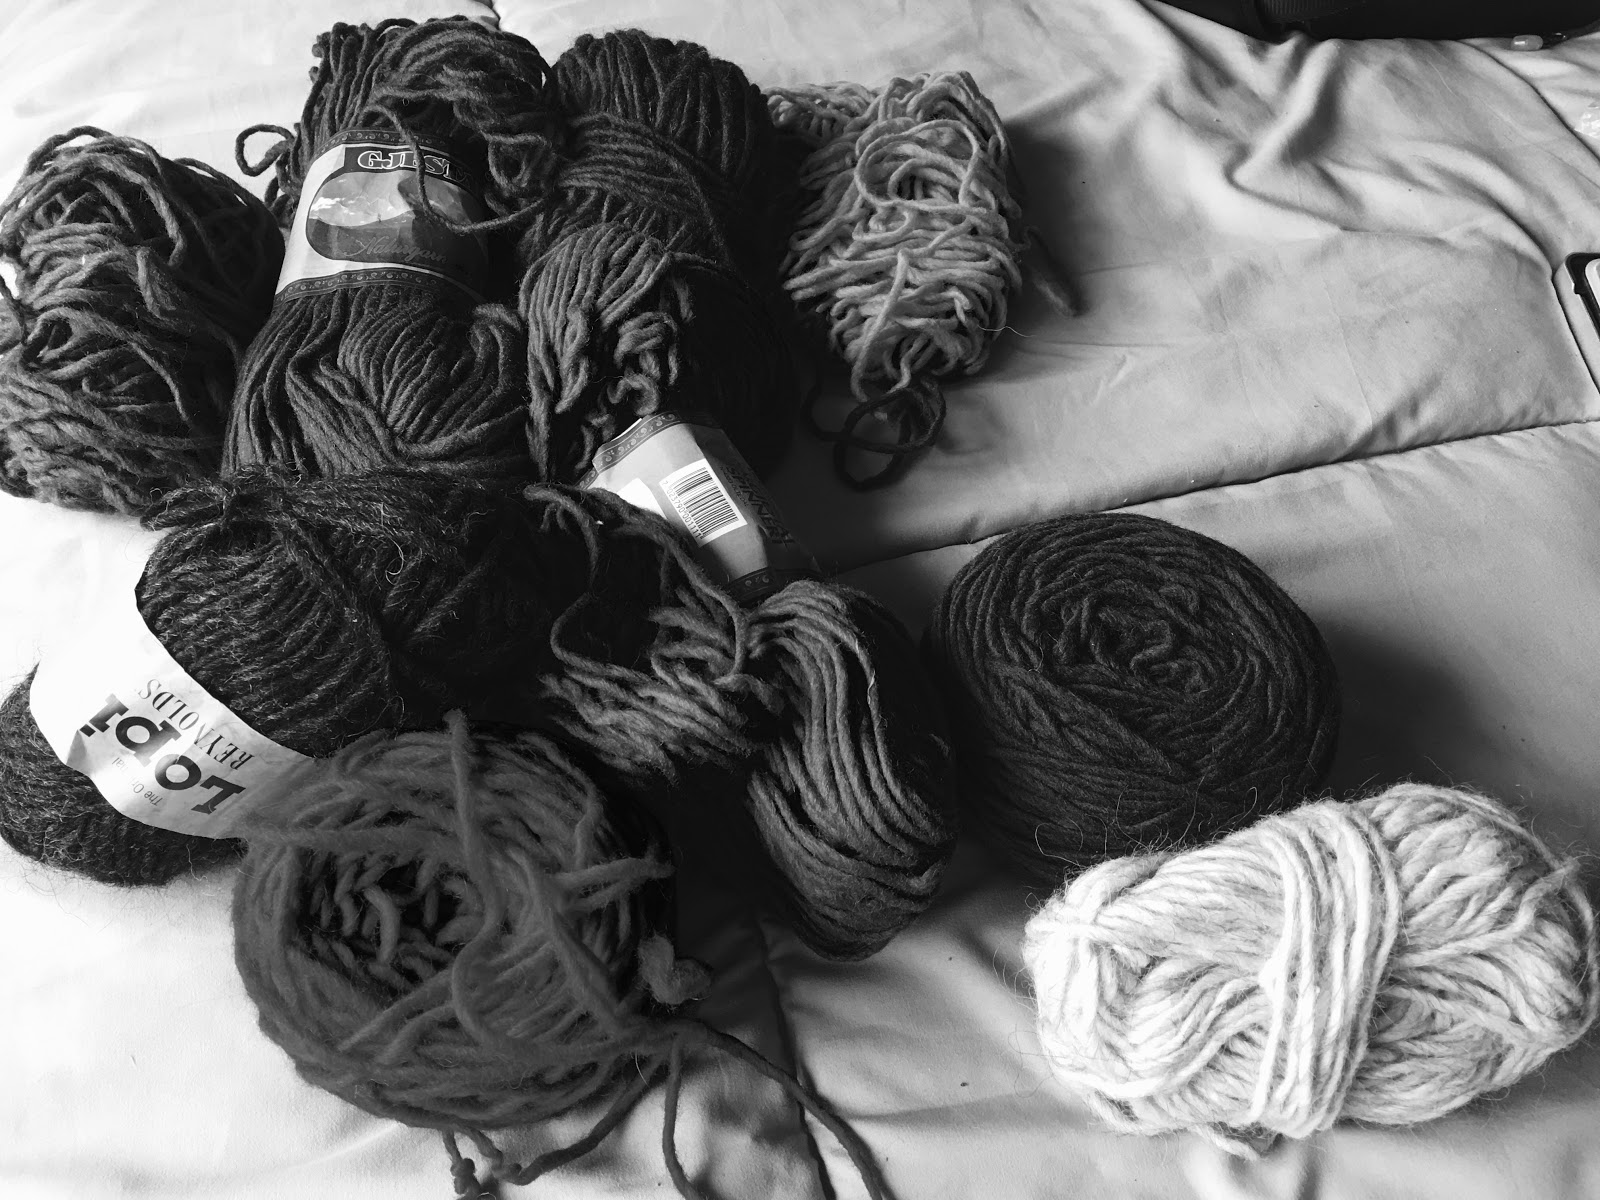
These are the colors. There are 9 skeins of the magenta in the middle, 3 of the violet on the top left and 1 skein of the red. The rest are what you see. I think I will warp with the magenta, using stripes of the others as follows:

  1. One panel will have the olive stripe outlined in yellow
  2. Second panel will have the olive stripe outlined in blue
  3. Third panel will have the red stripe outlined in pale gray

I am not sure if I will do one wide stripe or a couple of narrower ones. It depends on how much of the outline color I have. It will be asymmetric so I will just use what I have and decide as I warp. This is why these colors are going to be in the warp so I can figure out a way to use up as many of them as I can.

The weft will be mostly magenta with violet stripes. I have some dark gray and quite a bit of the red so I may outline the violet with either the red or the gray or both. Again, I'll wing it and I am not going to match the stripes on the panels.

I was concerned that all the colors have the same value. So I took a black and white photo to check. Guess what? I was right. There is a little variation but most of the colors are in the same value. Oh well. I want to use up the yarn and make something useful. This was more to train my eye than to make decisions. But at least the outline of each stripe and the stripe are different values.

This is what I am going to start next. I hope to warp the loom for the first panel this weekend.

On the knitting front, I am going to start a Niebling. One of my spinning guild members and I discussed started a KAL to knit Flieder. She is making a tablecloth and I want to make a shawl. She started in Feb but I was busy with the sweater so I haven't started yet. I am going to make 5 sections of the pattern rather than the full 8. This way it will stay on my shoulders. I have wound a teal colored Cheryl Oberle Dancing Fibers cobweight alpaca. I have made copies of the charts. So I am ready and that will also be starting up in the next week or so.

Thursday, April 27, 2017

Making stretchy yarn

When I first started spinning, I was fascinated by the process of making yarn .It is magical.You start with fiber that pulls apart so easily but then you add twist, and it becomes strong and holds together. Just by the application of twist.

However, as a knitter, I was a little disappointed. I am used to the elastic properties of wool and the yarn I made was not elastic. In fact, most of the yarn I have made has been used in shawls and scarves and cowls. Things that don't require elasticity. My yarn was even and soft and completely inelastic. I watched videos. I watched Margaret Stove make lovely elastic yarn and explain how she did it. But I wasn't able to replicate her results.

A couple of years ago, I took a singles class with Amy King. Amy is the low-twist singles queen. At the end of the class, she mentioned that she uses low-twist to create elastic sock yarn. I was intrigued and I asked her how she does that. Her method is to spin a very low-twist singles and then ply with the normal amount of plying twist that one would for that weight of yarn. As you may remember, we normally add twist to the individual elements of the plied yarn (the singles yarn) and then balance that twist energy by adding opposing twist in the plying direction. This is called a balanced ply. But in this case, we add more twist in the plying than we added in the singles. So the yarn isn't balanced. I spun a tiny 3-ply sample in that class and I was awed by the fact that it was indeed elastic.

I came back inspired and was discussing the topic online in one of my Ravelry spinning groups. I wondered how different blends would react to this process. One of the very lovely spinners in that group sent me 3 samples of roving she had - about 8 gm each. I intended to do some experiments with them but got distracted by other things. The rovings sat there.

While I was spinning the collapse weave yarns, another member of the same group posted about a class she took with Jillian Moreno. They had spun a variety of yarns in the class. One of them was a crepe yarn. A crepe yarn is one where you spin 2 singles yarns in one direction, then you ply them together with a lot of plying twist. You spin a third singles in the same direction as the plying twist and then you ply the plied yarn and the singles in the original spinning direction,. The reason you add more plying twist is because you are going to be plying again in the opposite direction.


This is a photo from Sarah Anderson's Spinner's Book of Yarn Designs. I took it to show someone the structure of crepe yarn. Anyway, this spinner said that the crepe yarn was very elastic. This discussion inspired me all over again. And in my experimental scientific mood following the collapse weave experiments, I finally picked up those rovings and did my stretchy yarn experiments.


 The first one was a Corriedale roving. Corriedale is a medium wool but it has a lot of crimp and it puffs up and becomes very soft and fluffy after the yarn is finished by washing. I expected this to become a nice stretchy yarn if I used Amy King's low twist singles with a high twist ply. And I was proven right. This skein stretches from 11" - 13" easily. Once released, it snaps back to its original length.


Next up was a Corriedale/silk blend roving, which you can see spun up and waiting to be plied above. I expected that the addition of the silk would reduce the elasticity. I wanted this as a comparison to the plain Corriedale I spun first. So I used the same technique. I did a low-twist singles and then added more plying twist. As I expected, it was still stretchy but much less so. The skein also relaxed a lot more. Wound on the same niddy-noddy, the skein was 13" when relaxed and stretched to 15", but relaxed back to 13" again.


The third roving was a Romney/silk noil blend. Romney is a long wool and thus does not have as much crimp as Corriedale. It has a wave. I thought I would experiment with the crepe yarn to see if it would add elasticity to what I expected to be the least elastic of the 3 rovings. 


This photo shows the 2 initial plies and the 3rd piece that is waiting to be spun in the opposing direction to be added after the first two are plied together. This skein relaxed the most. It was 15" long - also wound on the same niddy-noddy. It only stretched to 16" but also went back to 15" when released. Crepe yarns have texture, which you can see in the photo below.


Yardage also varied a bit. The Corriedale gave me 29 yds. The Corriedale/silk yielded 17 yds for the same weight, and the Romney/silk resulted in 17.5 yds for the 8 gm weight.

I think this is the first time I've been relatively scientific about my spinning. I mostly just spin and then decide what I'm going to do with the yarn based on its qualities after I am done. There is one more yarn structure I need to explore. It is called an opposing ply yarn and it is very stretchy. Another description of it is here.

Those of you who know the scientific method know that this is kind of scientific, but not quite. There are too many uncontrolled variables, and the fiber itself is very different. I want to add to this set of experiments by using a plain roving (not a blend) that I have and spin all three yarn structures with the same fiber and compare them. But that is for another time.

I started spinning the mystery wool (from a couple of posts ago) for socks using the low-twist singles/high-twist ply method. I am part-way through the first of the 3 singles.


The fiber looks like this. I divided in in 3 lengthwise instead of stripping it widthwise because the non-blue sections are sparse and I wanted them more distributed in the yarn.

On the weaving front, I did a quick little project. I had been saving an old pair of jeans that were worn and too big because I know denim is great for upcycling. In a Ravelry group devoted to rigid heddle weaving, the April theme is weaving with fabric. I was inspired to cut up my jeans and a T-shirt that I didn't like very much to make a rag rug.


I used the method described in this video to make the yarn. I used a thick, rustic cotton I found at a big box craft store as warp. To pack down the weft and create a thick, stiff rug, I used a hair pick. I had bought the hair pick to open up locks of wool and spin directly from them. But it was the perfect tool to pack down the weft and make the rug.

Another rabbit hole was exploring options to finish the edges. Who knew there were so many ways to finish rugs. I ended up doing a single Damascene edge and then making overhand knots to make a fringe. Typically, one would weave the ends back into the body of the rug after a single Damascene edging. But I found that too difficult with the cut up fabric. Hence the fringe.

One technique I want to try is a Maori edge. I had some leftover warp so I found some bulky Lopi-lookalike and wove a little sample. I plan to finish this using the Maori edge so I can see how easy or fiddly it is.


Now I am going to take a break from weaving to plan my next weaving project and finish up my Calmer hoodie. I've finished the pockets and now I need to join the pockets to the body and finish the bottom of the sweater. Then I have sleeves and a hood to knit. So that is a project that needs some time spent on it.

Thursday, October 23, 2014

Another quick time-management/organization update

I have recently been using the Pomodoro technque to get things done. I often get distracted easily, especially when I have to work on tasks that require concentration or tasks that I don't enjoy. The Pomodoro technique allows me to focus on the task at hand, but for a limited amount of time with a break after.

It is also good for making sure that I don't sit for too long. It gives me reminders to get up and stretch, get a drink of water, and generally move around.

I use a simple timer, the XPomodoro app, to help with this. The app costs money but I got it when it was free for a limited time. You can use anything, even just the timer on your phone or watch. It needs to give you an audible signal because you want to be concentrating, not looking at the time!

The app has a 30 min repeat built-in. That is all it is. I work for 25 mins and then I take a break for 5 mins. Lather, rinse, repeat till the job is done or it is lunch-time or time to go home.

I find this is attractive for jobs that I don't like doing because it is a finite time that I have to commit to it. Then I can have fun for 5 mins! Or, as I said, I use it a lot when I have to concentrate but my mind is resisting the concentration. Once I commit to the 25 mins, I find that I get absorbed in it and don't find it unpleasant. It is all just mind-games, but it works.

I don't use this for things that I enjoy doing, but I probably should. I am quite capable of sitting and spinning for more than an hour without a break. That is not good for body or mind.

I find this simple technique really easy to incorporate into my day and it helps me power through work quite effectively.

Friday, June 20, 2014

Cable wranglers

For some reason, I have a lot of cables. I travel with a lot of cables. Cables to charge my phone and my tablet, my laptop power cord, and last but not least, at least 3 sets of headphones. I am a headphone freak. I have different headphones for different things and I am paranoid that one of them will quit on me so I have spares.
I have been looking for a good way to handle the cables when they are rolled up. They always become tangled when I store them. I have seen cable ties but none of them appealed to me. As a result I have been dreaming of making my own, searching the web for ideas, etc.
In December, I bought some Sugru for another purpose. But since I wasn't sure how much I would need, I bought 2 packages. Each has 3 individual pouches of Sugru. They only last about 6 months as it dries up. I had stored the packages in the refrigerator, which is supposed to make them last longer. But I was still worried about their becoming unusable and therefore, I wanted to use Sugru for my cable ties, if I could. But I couldn't find a good solution with all my searching.
And that is why I designed my own. It is a pretty simple design and it works quite well. I made a few small ones over the weekend, which work well for the headphone and the charging cables. But they were too small for the laptop power cord.
I made one more today and documented the process.

1: the package of Sugru
2: the materials needed - Sugru sticks to most things but not skin or plastic wrap.
3: Everything ready to make the power cord wrangler - lay a piece of plastic wrap on top of the working surface; wrap the pencil or pen (aka the mold) in plastic wrap
4: Cut open a pouch of Sugru; knead it a bit to soften it up; gently roll it out into an even snake; flatten the snake a bit by patting it on the plastic wrap; wind it carefully in a spiral on the pencil/pen mold; leave to cure for 24 hours


After it has cured, you have a cable wrangler. These are the smaller ones I made last weekend. As you can see, the one I made today is a bit longer. I used a whole pouch for one wrangler vs. making 2 from a pouch like I did earlier. I hope this will be enough to hold the power cord neatly. If not, I have 2 more pouches and will make one with both pouches.
I hope this gives you some ideas on what you can do to custom build your own cable wranglers.
We will return to Tibet with the next post. I have the train photos organized so we will go on the train to Lhasa.

Sunday, October 20, 2013

Top down sleeve caps in the round - my version

Top down set-in sleeves are very cool. The sleeve cap makes itself; there is no sewing in of the sleeve into the armhole; and the knitting is easy. Well, it is easy if you've done some math to prepare.
First of all, seam the shoulder and side seams on the body, if you have not knitted it in the round. Pick up stitches around the armhole. You need to pick up 1 st for each bound st on the underarm, and 3 sts in every 4 rows in the vertical portion of the armhole. In the curved part, you need to pick up sts evenly spaced at a rate that looks nice, lays flat and doesn't ruffle. Make sure the number of sts on either side of the armhole - between the side and shoulder seams on each side - are the same. It also helps if you have an even number of sts but if you have an odd number, the center st should line up with the shoulder seam.

I take some time picking up sts as it makes a real difference in the way the finished sweater looks. Finishing matters!

Once you have that done, count the number of sts you have on the needle. Place markers at the point where the armhole bound of sts end, on either side. These are points C and D in the diagram above.

Now for the mathematics. No, it isn't hard. Just simple division.
Divide the total # of st by 3. Mark off these thirds. Now you have points A and B in the diagram above. If you have 1 extra st, put it in the section between A and B. If you have 2 extra sts in the remainder, put 1 each between A and C and another between B and D. These will tell you where exactly your A and B markers go.

The sts between A and B are the top of the sleeve cap. The sts in A-C and B-D sections will be where you work your short rows. .

Next, divide the number of sts in A-C and B-D (which should be the same if you have done everything correctly) into 3. This will now give you the points marked by the arrows above. Place a marker 1/3 of the way up from C and 1/3 of the way up from D. These now mark off the section in orange in the diagram above

We are now ready to start knitting. Your beginning of round will be at the side seam, mid-way between C and D. Start knitting and knit all the way to B. Turn and knit back to A, k 1 more st and turn. Knit to 1 st past B and turn. Continue knitting this way, increasing the length of the short rows by 1 st on each row (which will be on each side of the armhole) until all the sts in the black sections are incorporated into the short rows. You are now at the section of the armhole that is marked in orange.

Now you will start increasing the length of each short row by 2 sts. Why? because it reduces the number of short rows that you will work and that flattens the height of the sleeve cap. If I don't do this, I find that the sleeve cap had a bit of a puff sleeve look to it and I don't like that. If I decrease the number of short rows this way, I get a perfectly fitting sleeve cap.

You are done with short-rowing when you are at points C and D. Just knit across these sts and your sleeve cap is complete. You can now start knitting the sleeve, either knitting straight or decreasing at the sleeve seam as your shaping dictates.

I supposed that if you want to flatten the sleeve cap any further, you can divide the side sections (A-C, B-D) in half and lengthen the short rows by 1 st for half the sts and by 2 sts for the other half. Once you recognize that you don't have to keep lengthening the short rows at an even rate, you can create a very customized sleeve cap. Just keep good notes so you can repeat it on the other side!

As for the short rows themselves, I like a wrap and turn. I don't pick up the wraps. It gives me a look that I think imitates the 'fully fashioned' shaping that some commercial sweaters have. I happen to like that look. You can use whatever short row method you like.

I hope this helps and isn't too hard to follow!