Saturday, December 31, 2011

Another year flew by!

Happy New Year to you, my dear readers! As I write this, 2011 is almost over and I am looking forward to 2012. I hope the new year brings you joy, prosperity and good health. I hope that there is more peace in the world and less suffering. 2011 was a tough year for many folks but there were also some streaks of light in the east. People stood up for freedom and against tyranny. I hope their sacrifices don't go unrewarded.

My goals in 2012 are to work from stash and not to buy more yarn. I have lots of yarn and I am making more.

I started spinning again. I had been on a hiatus since Oct for one reason or another. I plied the singles I had spun back in Oct but I haven't finished the yarn yet. Then I started spinning this Targhee top that I bought on clearance from Woodland Woolworks last spring. I needed the bright colors as it is dreary and gray outside. It also gets dark early so the colors are my way of brightening up the dark days of winter.

I also started another shawl. This is in a linen/silk blend from Colourmart. I had bought 3 cones in different colors a while ago. I am making the Dancing Cranes pattern from Elann.com. It is a simple lace pattern from one of the Barbara Walker treasuries called Japanese Feather. I designed and made a pair of socks with it years ago.

This stole is for a niece who is in India. I think the linen/silk will soften with time and also be cool for the hotter climate. The swatch (pictured above) has a nice crisp hand but is not as soft as I would like. I think I'll machine wash the stole to see if it softens up further before I deliver it.

Wednesday, December 28, 2011

After blocking pics


I thought I'd add the after pictures also.

Tuesday, December 27, 2011

The Good, the Bad and the Beautiful

I don't know why I do these things. Sometimes I just get on a roll and want to finish a particular project. This one was one of them. I have been knitting the edging for days. The good news first: the stole is done and is blocking. The bad news: my hands hurt. The body of the stole was not a problem. It didn't hurt my hands. The edging did. You pick up sts all around the perimeter of the stole and knit the edging. I think the problem was the k3tog and sssk's that were part of the edging. Or maybe the 800 or so sts...

Anyway it is done. I am going to rest my hands for a few days by doing non-knitting things.

And last but not least, the beautiful: isn't it a lovely pattern? I am very pleased with the outcome.

Sunday, December 11, 2011

More on nupps

Colleen, thank you for the helpful suggestions on nupps. I tried doing the double wraps on some and all of the yarn overs. However, for me, the nupps turned out very sloppy. But your suggestion to tug on the nupp did the trick. For me, tugging on it after slipping the 6 loops over the first p1 made lovely even nupps.

All that experimenting resulted in nupps that looked very different from each other and the result was messy. So I ripped it out and started over.
Now I am happy with the resulting pattern. It is looking like lace. Yay! On with the remaining 10 repeats to finish the stole.

Monday, December 5, 2011

Nupps and beads

I started knitting an Estonian lace shawl. It has nupps which are like little buttons of yarn. You make a lot of new sts in one st on one row and knit or purl them all together in the next row. People find this to be a pain and often substitute beads for the nupps. Beads are also decorative, so why not?

That was also my plan when I started this shawl. I was going to put little fresh water pearls on the shawl. Well plan A failed because the holes in the beads were too small for two of the yarn thickness to go through. I can. Use them but I have to string them all on in the beginning, which I had not done. On to plan B, which was to try out a very simple method using a crochet hook. That worked but I didn't like the result. It made messy little nupps that looked more like bobbles. Bobbles stick out more and they wobble, whereas nupps don't. 

I resorted to making the nupps the traditional way. I simplified the p7tog part of it by purling 1, putting it back on the left needle and passing the other 6 loops over it before returning it to the right needle. 
Here's the shawl, or a tiny bit of it. There is a lot of knitting left in this one!

My daughter had an indigenous bead wrap on her wrist. I liked it so much, I got one just like it! Aren't they pretty? I have to see how long it will last. 
Back to knitting and nupping!

Wednesday, November 30, 2011

Picking up and knitting a hem or a facing

This is a step-by-step tutorial on how to pick up and knit a facing or a hem. A facing is a shaped piece of fabric that is used to cover up raw edges. It is used most often in sewing on the insides of button bands, collars, and neck trim. In this case, I am going to knit a hem that is also a facing. But the process applies to both.

In knitting, facings are most often used to enclose steeks but that is not their only purpose. I am using it here to enclose a steek.

Step 1 is to pick up the sts along the edge that is going to be enclosed. The key here is to pick up sts along a straight column of sts so that it looks neat and finished. This is a view of the picked up sts from from the wrong. You can see that the picked up sts follow a straight line. It is very easy to move a half st over. If you notice this, it takes very effort to start over.
It is easier to see along the yoke where there is less curling. When I picked up these sts, I noticed I was a half-st off when I got to the yoke because I started at the hem. That would have removed a half st from the yoke, which would have been noticeable. So I started over.When you pick up sts, the steek (in this case) automatically turns under. The steeked edge tends curl inwards due to the stockinette. If another st was used, it may not turn under until you pick up the sts. See how nice and flat the steek is? This is why I didn't want to use the crochet steek. If I was knitting, for example, a button band and wanted to knit a facing at the same time, I would pick up a st and create a st by doing a yarnover. So the pattern would be *pick up and knit 1, yo, rep from * to end. Then I would separate the yarnovers by putting them on a different needle. The picked up sts would become the button band and the sts created by yarnovers would be used to knit the facing in the other direction as we will be doing here.

Step 2 is to knit the facing. This is usually in stockinette. Sometimes a thinner yarn is used to knit the facing using the same size needle as the body. This makes for a thinner fabric which cuts down on bulk. Facings can also be used to provide a pop of color when the finished edge turns inside out. This is used a lot on sleeve cuffs. When you fold the cuff up, the facing gives you a different color on the end of the sleeve.
Here is a view of the knitting from the wrong side. In this case, I am knitting a picot hem. So I created the picots along the turning edge by a row of k2tog, yo. After that I continued knitting the hem/facing. In this view, I am part-way along the hem. You can see the row of yarnovers that will make the picots.You can see how flat the steeked edge is and how nicely it folds to the inside. I am doing this all along the front edge.Once you have knit the facing with enough depth to cover the steek, most of the work is done. Step 4 is to verify that your facing will cover the steeked edge. You can fold it along the turning edge (the row of yarnovers here) to verify that it is deep enough. I didn't take a picture of that as I ran out of hands.

Step 5 is to bind off the facing/hem.

Step 6 is to sew it down. I like to sew about every 2-3 sts, skimming through the wrong side of the fabric and then up through one of the bound off sts. If you go all the way through the fabric, it may be visible on the right side. But if you go through the purl bump part-way, it will be invisible. Make sure that you aren't pulling the sts too tight as you sew. Turn it to the right side frequently and check to make sure that the sewing is both invisible and doesn't interfere with the elasticity of the knitted fabric.

You can just run the end of the yarn into the hem/facing and you are done! I like to do a double st as the beginning and and end rather than using knots.

I hope this helps you visualize the process.

Sunday, November 27, 2011

Steeking a Bohus

I finally picked up and worked on the Rose Lace Collar Bohus and it will probably be finished today. I first finished the second sleeve (I had about 10 rounds remaining!) and hemmed both sleeves. Here is an unblocked view. I did a little colorwork on the sleeve cuff.
Then I hemmed the bottom edge.Now I had to cut the center front open. I started doing a crochet steek, but I didn't like it. It was bulky and I was struggling to manage the tiny hook (1.65 mm) and see the rows and sts where I had to pick up the loops. So I abandoned it in favor of a backstitched steek. I did 2 rows of back stitching on the sts that would have been united by the crochet.

If you number my steek sts as 1, 2, 3, 4, 5, 6, 7, 8, 9, 10 from left to right when facing the front, I wanted to cut the steek between sts 5 and 6. The crochet steek would have gone through the right leg of st 4 and the left leg of st 5 on the left of the steek, and the right leg of st 6 and the left leg of st 7 on the right of the steek. I backstitched down the right leg of st 4 and up the left leg of st 5 and repeated down the right leg of st 6 and the left leg of st 7. I hope this makes sense. If it doesn't, I can add a diagram.

Here is the stitched and cut steek on the right front of the garment.

It is easier to see on the reverse side as I used a matching color sewing thread. It would have been faster to machine st it but I would have to take out the machine, thread a bobbin, etc. So I decided to sew by hand. As the daylight hours waned, I had to rely on my daylight lamp + magnifier (something similar to this) to see the sts.Here is the reverse where you can see the two rows of pink stitching between my fingers. The steek edge curls to the inside just like with any other steek, that is why I had to hold it open. I picked up sts and knit a picot hem down the front edge and made it long enough to cover the cut edge. I prefer to bind off my sts and then do the hem, rather than securing live sts as one requires fewer sts to hold the hem down and it is less visible from the right side. It also makes a nice edge on the inside. Lastly, here is the view from the right side. You can see the finished edge on the left front and the raw, cut edge on the right front. No unraveling here. The Bohus yarn is very sticky and the stitching does a good job of securing it so it doesn't go anywhere. I suspect that it would have been stable even if I hadn't stabilized the edge. That is an experiment for a future Bohus.

Today I hope to finish the other front and block the jacket. I tried it on yesterday (yes, with cut and unfinished edges) and it looks exactly as I had envisioned it. I don't plan on putting buttons on. It will just be an open cardigan that I can add a pin to, if I wish to hold the fronts together.

Sunday, November 13, 2011

A mad rush

I don't know what came over me last week. I have been eyeing this shawl at the LYS for the past few weeks, and last Saturday I just had to have it. I cast on last Saturday and I finished it yesterday!
Before I show you the completed item, I want to provide a little tip. When you know you are going to pick up sts from an edge, you should plan for the finished appearance. In this case, I am going to increase and decrease along an edge that I will later pick up sts from. Normally, when I increase or decrease along an edge, I do it one st inside the edge so that it looks neat and provides a clean set of sts (without increase or decreases) to pick up in. However, in this case, I also wanted the increase and decrease sides to match and look finished. So I did the increase/decrease 2 sts in from the edge. The edge st was the seam allowance - the st line that I actually picked up the sts in. The second st was the nice clean edge that would finally be visible on the shawl.

Here is the edge before I pick up sts. It is hard to see the last st. The line of sts that is visible is the second column of sts.

In this photo you can see that that line of sts is still visible after I pick up. This also makes it very easy to see the rows as you pick up sts because you have to pick up 3 sts for every 4 rows since I am picking up along a stockinette edge.
There is the finished shawl. I finished it last night but I left on a business trip this morning. I took the shawl with me and wore it on the plane. I blocked it with a steam iron in the hotel room and there it is drying on the bed. It is a lovely, warm and cozy shawl.
The yarn is Cascade Eco Duo in the color Vanilla. I love the warm cream color and the subtle variations in color that stripe across the shawl.
The pattern is from the LYS. I made the ruffle deeper and did an extra set of increases because I had the yarn to do so. My motivation was to use as much of the yarn as I could.
It is like a triangular shawl but the bottom edge is curved. You can see that unbroken line of sts across the entire bottom above the ruffle. That is the second st in from the edge. It makes for a very finished looking edge above the ruffle.

All in all, an easy knit and one that I know I am going to love and wear for a long time.

Sunday, November 6, 2011

Knitting and Spinning update

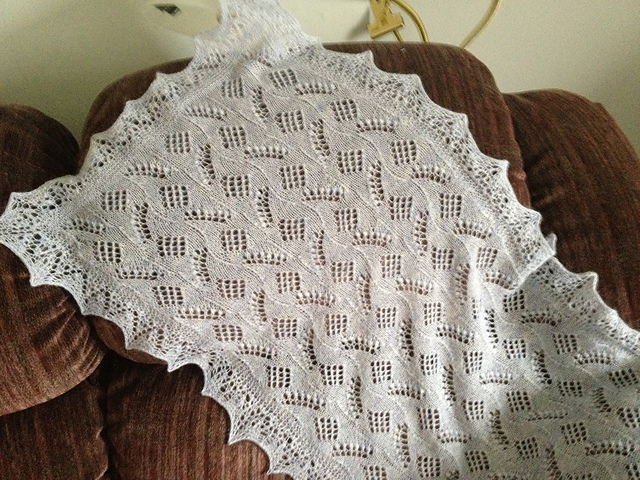
I finished up a modular pillow for a class that occurred yesterday. It is knit center out from Noro Taiyo using 
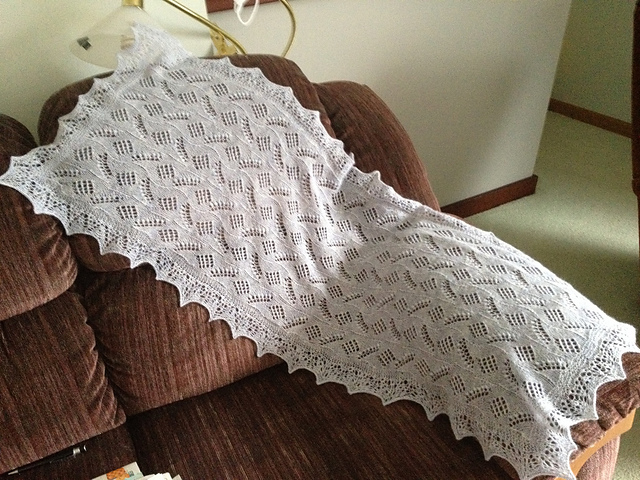
Emily Ocker's cast on. It was a good refresher for me as I haven't used that cast on in years. I enjoyed seeing the colors develop but the knitting was hard on my hands. The cotton/silk in Taiyo was unforgiving and inelastic. But the end result is pretty. I made it reversible but not identical. If you are feeling warm and fuzzy, you can use the warm side.
Or, you can embrace your cool side by flipping the pillow over.
I went to a spinning workshop with Judith McKenzie right after Rhinebeck. It was truly amazing. The workshop was set up by Hansencrafts, specifically focused on the mini-spinner. Beth and Kevin Hansen are great hosts. They had arranged for everything - snacks, coffee, goodie bags and plenty of camaraderie along with the learning.

On the first day, we learned to adjust the mini-spinner so we could spin yarns of different diameters. It was a different way of thinking about diameter. On the one hand, you can control how much fiber you are drafting to change the diameter. Judith's view is that we all have a natural way of drafting and eventually we'll revert to that. So she believes in setting up the wheel to help draft the desired diameter. All I can say is that it works. Here's my ring of samples from thin on the right to thick on the left. Each is plied back on itself so they are all comparable. Can you believe I spun the laceweight on the far right?
We also learned to spin thick and thin yarn. Here's my flame yarn sample. Not great but definitely thick and thin. Flame yarn is thick and thin yarn plied back on itself.
After that we spun a variety of fibers. In this picture of the leftover fibers, we have (clockwise starting at the top left) cashmere, bombyx (cultivated) silk, yak/silk, a silk hankie (from the goodie bag, I didn't spin this although Judith demonstrated how to), tussah (wild) silk, light and dark BFL, cashmere and cotton. Yes, I spun cotton using long draw. It was fun. I didn't get enough twist into it because some of it fell apart when I wound it off the bobbin. But I have more to practice with. I made little 2 ply samples of these and put them in a folder.


We also spun silk noil using long draw and I tried carding some of it. I have some samples but I didn't like spinning it. Bits of cocoon and insect parts fly off in all directions and it is impossible to pick all of it out. I found it messy and a bit off-putting.

Judith gave us some dyed mohair locks to try spinning boucle. I am afraid that I failed miserably. My boucle yarn is coming apart. I used some Habu silk as the core. But then, as we left, Judith explained what I was doing wrong. I have to practice a little with these locks to see if I get it. You have to grab the fiber with the hand holding the core and then slowly release it from the hand holding the locks. I was just holding it close to the core thinking the twist would grab it. We spent a lot of time discussing how to spin for color. Judith gave us samples of color (I took some more later as she wanted us to take the extra fiber to avoid having to cart it back) and we practiced holding 3 colors (A, B, C) in parallel and spinning across all of them. You get color A, color AB, color B, color BC and then color C. After you go back and forth across these a few times, you switch out A for D and continue spinning across B, C, D. Then you switch out B for E a while later. Then A comes back in when C is removed and so on. You spin the next single the same way if you want the colors to line up in self-striping units. Or you can cable the 2 plies together to get a lovely yarn that has spots of color sprinkled all the way through. This one is a test of pure worsted spinning which I have to work on. You don't get the pure color and the dense yarn you need for socks without spinning worsted.

Our goodie bags had lots of things - pins from Zippypins, who was in the class with us, the silk hankie, a clip with beads to help hold the yarn end when taking a break, and some Potluck roving from Ferndale Fiber. I got some Paradise (the green/blue below) in my goodie bag. Later we had a random drawing to select another ball and I picked Paradise again. Lastly, at the end of the workshop, there was still more fiber and we got to pick again. This time I got Stormy Seas. Thank you Ferndale Fiber!


All in all, I loved every minute of the workshop. I came away with a lot of ideas on how to spin and now I need to practice all the various techniques I learned. If you get the opportunity to take a class with Judith, jump at it. She is a wonderful teacher!

Monday, October 31, 2011

Rhinebeck!

I had a wonderful time at Rhinebeck. For a change, I actually bought quite a bit of stuff. In the past I have bought a few high ticket items but this time it was a lot of lower-priced things. It definitely made the experience different. I had made a note of a few vendors that I wanted to visit but there were a couple of impulse buys.

As usual, I bought soap from Clove Valley Soapworks. They are local and I can buy their soap at a local farm but since I was at Rhinebeck, I decided to stock up. I only use their goat's milk soap now. It keeps my skin from getting too dry and the fragrances are mild but wonderfully pleasant.

I also had plans to buy buttons for my cabled cushion/pillow. I couldn't find matching large buttons but I found these two coordinating Fimo buttons and decided to go with an asymmetric look. I am pretty pleased with the result. I had envisioned large natural wood buttons but these fit the bill. The rest of my purchases (except for one I have not photographed) were all fiber. I did buy another orifice threader from Hansencrafts to use with the Tina. I prefer these to an orifice hook. But that is also something I'll have to photograph later. On to the fiber!

Each of the following is 4 oz. The first is some CVM (California Variegated Mutant)/silk dyed with lac and indigo by Handspun by Stefania. It isn't very clear in the photo but there are subtle mauve tones in it.
Next is a braid from Miss Babs. It is called Scarlet Ibis and is BFL.
In contrast to the brightly colored one above, I bought two more muted braids from Into the Whirled. I don't remember the details but you may be able to read the labels. The left one is Targhee.
Back to the brights, I bought two braids from Gale's Art. She had dyed the blue BFL I just finished spinning and I loved it. The bottom one is called Moldy Pumpkin! So very seasonal. It is a mix of dark and light BFL. I think the other one is called Scarab. Another customer in the booth recommended it as a good color.
I am dreaming of a handspun Log Cabin blanket so I bought a couple of gradient dyed rovings from Fiber Optic. I had bought a couple on sale from Corgi Hill Farm, one of which I am currently spinning. That is rather dull so I wanted a couple of bright ones to enliven the blanket. I think these fit the bill.
And last but not least, some green merino from Spinners Hill. I fell in love with the color. It is a mix of brights and darks.
I had to force fit all this into my fiber shelf. But fiber squishes, doesn't it? I guess I'm all set for the winter. I have bright colors to complement the dark outside.

I also took 2 classes. I took 'spinning the yarn you want' with Amy Tyler and 'getting more productive with your spindle' with Abby Franquemont. I loved both classes and learned a lot. Amy is very organized and taught us to mimic a yarn that was already spun. This was very complementary with the spinning retreat I went to following Rhinebeck. More on that next week. All in all, it was a wonderful fiber-filled, delectable and eye-opening week. There is so much I want to try and work on this winter.

Thursday, October 6, 2011

A mixed bag of goodies...

both figuratively and literally. First the literal part. My Tour de Fleece prize arrived yesterday. I got a lovely spindle bag, a notions bag, a cute guy and 6 glazed donut soaps. So cute! I love goat's milk soap. In fact I only use locally made goat's milk soap from Clove Valley Soapworks on a daily basis. I will be stocking up at Rhinebeck although I can get it at other places locally also.
Now on to the figurative mixed bag of goodies!

First, a lovely blue skein of BFL that I just finished plying. It is a 2 ply from singles that were spun from the fold. The fiber is from Gale's Art, who will also be at Rhinebeck. It is very squooshy.
I also FINALLY finished spinning some white BFL I bought at Rhinebeck years ago when I got my Bosworth spindle. I have been rolling the singles into balls that I will ply some day. I am so sick of white that I need a break. Here is the spindle and all the little balls that have been wound off from it. The tiny ones on the lower left are the first ones I spun on it. The larger ones on top are more recent.
This is what I'm going to spin next on the spindle. Lovely Polwarth from Briar Rose that I got at Camp this summer. She will also be at Rhinebeck.
And last, but not least, is the Rose Lace Collar who may or may not make it to Rhinebeck this year. As you can see, the second sleeve is almost done. I have to do the colorwork, stitch up the hems, crochet the steeks, cut them and then do the bands. Progress is being made slowly but steadily but I don't do well with deadlines and I want to make sure this is right, so I don't want to rush it.

And that is the mixed bag of goodies for now... I won't be posting till after Rhinebeck unless I finish the Rose Lace Collar.