Friday, November 30, 2012

A dervish has landed

In case you had not noticed, I am obsessed with supported spindles lately. Spindling in general, and supported spindles in particular. The process of spinning on them is very efficient and I like being able to sit and spin anywhere. I like drop spindles because I can stand up and walk around while spindling and posturally that is better. But being able to sit and spin is also nice.

There are some supported spindle makers whose spindles are prized and availability is limited because their spindles sell out as soon as they are listed. I have been fortunate in the past few weeks to catch a couple of these updates and succeed in snatching up a spindle or two.

Yesterday, one of these arrived from Tasmania. The maker is Malcolm Fielding and my style of spindle is called the dervish.


The shaft is a manufactured wood called Dymondwood to ensure that it is straight and doesn't warp. The whorl is made of silky oak and I think it is beautiful.


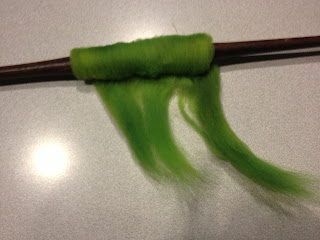
Malcolm sent along some Tasmanian Corriedale with it and I couldn't resist starting to spin. The fiber is luscious. It is silky and drafts like butter.
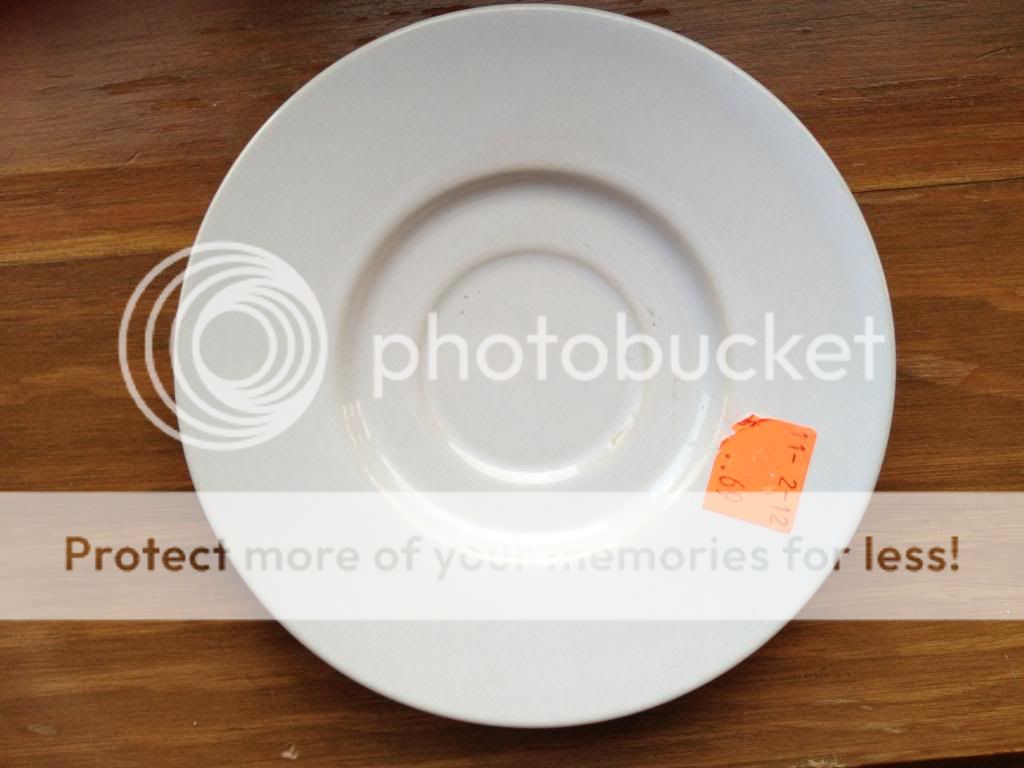
I also stopped at Goodwill and found this nice solid saucer for $0.69. I actually paid $0.67 because I am over 55. It is heavy so will sit firm while I spin on it. The spider bowl that I was using makes noise as the disco balls on my trindle hit it. So it will be good for the other spindles. I like spinning supported spindles on my leg but the trindle is also very sharp so if I am wearing a softer material on my legs, it pokes through and hurts. Jeans work very well for spinning without discomfort but other pants don't. This saucer will be perfect for the trindle.

Over the weekend, I will show you my newly enlarged spindle stable so you can see how far down the rabbit hole I have fallen.

Tuesday, November 27, 2012

Faux rolags take 2

I managed to finish spinning the first set of faux rolags I made. I had to rotate the rolag so that the fiber was always presented sideways to the orifice because it would clump up and the fiber would start feeding in straight. That does not work with long draw. Also this merino is sticky. I don't know if it is typical of merino or not. I've spun merino/silk and that drafts much easier. This is 100% merino and it doesn't draft easily at all. But it isn't felted or matted either.
 This is the finished single. Not easy to spin but will make a nice softly spun yarn.

I made more faux rolags with the second half of the fiber for the second single. I modified the process slightly.
 First of all, I used a little skinny rolling pin. That made smaller rolags and I'm hoping these will work better. The previous ones were too large.

Initially, I tried to just pull the fiber apart width-wise and roll it up.
But it made a pretty wide rolag and it didn't roll up neatly on my pin.

 Then I stripped the fiber in half lengthwise and then spread it out and pre-drafted it. I thought this might help the sticking. So I not only pre-drafted lengthwise but I pulled it apart width-wise.
 You can see the difference in the before and after strips.
 Then I rolled it in the pin but when I tried to separate it from the main strip, it almost never separated cleanly.
 But I rolled up the excess also into a nice little bundle. Then I slid it off.

And there is the nice pile of rolags. Let's see if these are easier to spin. If not, I will try again with some other fiber but not for a while.

Monday, November 26, 2012

Spindling a gradient part III

There is also some knitting content here.  :-) I am still knitting, even though it seems as if all I'm doing is spinning.

 I spun a lot of the gradient on my trindle but it seems to be never ending! I unloaded another cop onto a bobbin and marked the second one with two rubber bands so I know the order in which I have to ply them. I will do the same on the other single and ply starting with the 1 rubber band bobbins.

Note to self: if the bobbin is not spinning well on the bobbin winder, it will not pull the single from the spindle shaft. And no amount of feeding it in is going to help. Fix the bobbin on the bobbin winder, don't keep messing with the spindle. 

Now for the promised knitting content. My Polyhymnia's Triangle is coming along nicely. The rows are getting longer and longer and I always seem to mess up the pattern somewhere in the beginning so I am doing a lot of tinking. That really slows down the knitting.
But I am getting there....

Friday, November 23, 2012

Faux-rolag fail

I started spinning the faux-rolags I made the other day. I didn't do a very good job, or the fiber isn't right or it isn't all that easy to spin. I am able to spin them but it isn't easy. This is merino which is is crimpy and maybe doesn't draft as easily. I haven't spun a lot of merino so I can't dismiss that option.

It isn't drafting very easily. When I spun from rolags, the fiber drafts easily. This needs a little help from my leading hand. I am getting a nice soft single, but it isn't easy. I am pulling the rolags apart and really spinning from the fold.

It is going relatively fast. So I think I can finish the first single tonight and I will spend more time making the faux-rolags for the second single. I will draft out the fiber more and make smaller rolags with a thinner inner core.

More later.

Finished cotton skein

Just a quick update to my previous post... Here is the finished skein after boiling and drying
As usual, I have a quarter to show relative thickness of the yarn. I have been doing this with all my handspun so I have something to compare them with each other, if necessary.

Thursday, November 22, 2012

First attempt at spinning cotton

 Since I won a supported trindle at the Tour de Fleece this year, I decided to learn to spin with it using cotton that I had acquired in various ways. It was all combed cotton top.

I started with the red skulls that I had won with the trindle. It was a lot of fun spinning with that.  In fact I spun with red skulls and a spider bowl on Halloween!

I initially spun only around 15-20 mins a day as it was tough getting the spindle to spin and draft at the same time. I did a lot of 'park and draft' type spinning. I spun the trindle to build up twist and then I would draft a bit and then spin it again.

Joining was tough in the beginning. I would end up throwing out bits of fiber when I joined as I just wasn't getting it all caught up right. That worked itself out as I got more proficient.

Over time, it got easier and I could draft and spin the trindle at the same time. I found the red skulls a little light as the cotton cop built up on the shaft.


 At Rhinebeck, I got some heavier disco balls, which helped a lot. The trindle spun slower but longer and that helped build up twist so I could draft out while it was spinning. I also found that sometimes, it was easier to just spin on my thigh rather than in the bowl. It depends on what you are wearing. It worked well on jeans but not so well on sweatpants.
 As the cops got built, I wound them off onto weaving bobbins. I used a shoe-box kate because it was easier than some of the other things I had around.

I ended up with 3 weaving bobbins worth of singles.
 The three weaving bobbins fit nicely on my new Will Taylor kate and I plied from the largest and one of the others first. After the smaller of the two ran out, I started the third. One lesson I learned was not to leave the cotton dangling while plying. I put a rubber band around the weaving bobbins so I wouldn't lose any twist. But I forgot about the single hanging there.

When I got back to plying later, I had to toss about 6-8" worth of singles before I had a strong single with enough twist in it. I made a bracelet with the last bit after the second bobbin ran out and finished plying as usual. I added a good bit of plying twist and there was a lot of twist in the singles.

 There is a decent amount of yarn from all this. It is essentially 'free' yarn as I paid for it as part of a class or a retreat. I thought I would just have a sample skein but I think there is enough to make something with it.


As you can see, the skein is skewing to the left, to the plying side, to show how much plying twist I put in. This is pre-finishing.

Finishing cotton seems to be a matter of many different opinions. The Intentional Spinner says that it should be finished similar to protein fibers. Spin Control says it should be boiled for 30 mins with washing soda. Stephanie Gaustad also says boil with washing soda in her Spinning Cotton video. I found boiling with baking soda and boiling with detergent as other recommendations on the web. Since I didn't have washing soda and I wasn't going to buy some for this skein, I just boiled it for 30 minutes without any additions.

I then cooled it immediately with cold water, squeezed out the water, snapped it between my hands and also thwacked it for good measure before hanging up to dry. The skein is straight now. Let's see how it feels when it is dry.

Overall, a successful experiment. I am very comfortable with the spindling technique, I liked spinning the cotton and while this yarn is a bit thick-and-thin, I definitely got more even at the end. So I can produce a nice yarn if I do this again.

I am now going to start some supported spindle projects with wool and see how that differs from cotton.

Wednesday, November 21, 2012

The last prize for the year

I hope this is the last prize for this year. I am now feeling extremely guilty about all the stuff I've won this year. But this lovely bag showed up in the mail today.
It is the perfect size for a project bag and has the perfect theme. This is a Tour de Fleece prize from one of the teams I was on.

So adorable!

Sunday, November 18, 2012

The cowl is finished!

I have never been more thrilled at finishing a project. After all the false starts, the cowl knitting went smoothly this time and it is done. It is blocking as we speak.

I added beads on the stems of the leaves. There are yo, k1, yo sections in the pattern and I put the bead on the k1 between the yarnovers. 

I need to get some pins and pin out the scallops. They look a little messy with just finger blocking.
I used the Elizabeth Zimmerman sewn bind-off so that it would be nice and stretchy to go over the head. The yarn is Juniper Moon Findley Dappled and it is a lovely yarn. The cowl is soft and very cushy. The ball is very large and this cowl uses a very small part of it. So if you have some leftover, this is a perfect project.

Saturday, November 17, 2012

Finally, success without a twist

I started the cowl again. Yes, it had a twist. No, I cannot figure out what happened. But I don't care any more. I went back to some well-loved dpns. I was using a new set to start the other because they happened to be handy and I didn't like them with this yarn.
 There it is. Half done. I started on the size 4 ebony dpns above and just switched to the size 3 ones below. They are rosewood. Both have lovely points for lace. Not too sharp and not too blunt and they feel like heaven in my hands.
 A close up of the gorgeous yarn with the beads. The beads sparkle nicely in the variegated yarn.
 I also make some faux-rolags to play with on the wheel. This is Spinners Hill merino from last year's Rhinebeck. I made them following this method, which I have wanted to try for a while.
And a close-up. I've done half the merino for one single. I think I want a skinnier thing to roll it on. I used the roll from contact paper as I thought my rolling pin was too thick. Next time I will use my skinny rolling pin from India.

Thursday, November 15, 2012

Washing a fleece using seed starting trays

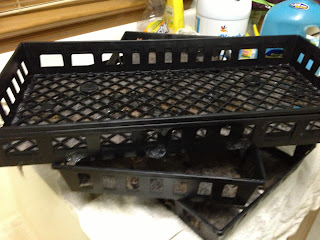
This is the third method of washing locks that I am trying and I have to say that I am sold on this. I looked for trays with holes in the bottom and I guess they show up periodically at dollar stores or thrift stores. When I went looking for them over the summer, I didn't find any. I hit every dollar store around me and also the thrift store and failed. So I ended up buying these seed starting trays online. I had to buy a pack of 10, which was OK because they were approximately $1.00 each.

Plan A was to use the large foil pans (the ones that go in those wire chafing dishes) as I had done when I washed the previous lot of fiber. But, as they say, the best laid plans.... The trays were too big for the foil pans.
Plan B worked. The trays fit exactly into the tub in my laundry room. Of course, this means that draining is easy.
 These are the locks loaded into a tray. I only put one layer of locks in each tray because the trays are quite shallow. I think I could do two layers but they would take longer to dry. If I had a whole fleece, I might do that.

I am washing 3 trays of locks at a time to save on hot water. I start by putting in a couple of inches of hot tap water into the tub and soaking each tray for 15 mins. This is just to remove surface grime and wet the locks thoroughly. These locks are clean and the water is barely dirty after the first soak.
I use an empty tray to help keep the locks in order. When a tray with locks is put into or taken out of the water, the empty tray is nested into it and pressed down. This helps keep the wool underwater till it is saturated or helps squeeze water out of it as I remove the tray. It worked like a charm. Since the trays nest into each other closely, it is easy to do this.
 This is one tray soaking in a soapy bath. I washed these in Dawn dish detergent to remove the lanolin. For the wash and the rinse soaks, I added about 3 quarts of boiling water to the tub in addition to the hot tap water. I did this for each tray so the water remained hot. Each soak was 15 mins long.
 Wet locks after they come out of the wash. I stacked them on top of each other on top of an old towel so that they didn't drip all over everything. I rinsed them in hot water using the same process (boiling water + hot tap water for a 15 min soak).
 After all the washing and rinsing was over, I put the trays on my laundry drying rack over night. There is a heating vent just below the rack so they got plenty of air. They looked dry this morning.
 But just for safety's sake, I moved them up to an unused bedroom and stacked them up there. I will leave them to air and dry for a couple of days before I put them away. Another advantage of these trays is that they can be stacked on top of each other in very little space. They are also light.
As far as actually using the fiber, I am spindling away. This is more of the gradient being spindled. I also started spindling a Cormo top on my little Kuchulu. I am so not into knitting right now. I just want to spindle.

Monday, November 12, 2012

A visit to Shanghai, China

Shanghai is a very old city dating back to French and British colonial history in China. But it also has a modern side. The Chinese government has expanded the city on the east side of the Huangpu river (called PuDong or east of the river) whereas the historical city is on the western bank (called PuXi or west of the river). PuDong is where we stayed and it is a very modern, spacious area. Here are some photos from in and around our hotel.
This is a view of the river from our hotel room. PuXi is on the other side. We were on the 28th floor.
 Right outside our hotel is a huge elevated pedestrian walkway that goes around a traffic circle. There were a lot of tourists and pedestrians crossing the streets here and so the elevated walkway was installed to speed up traffic and prevent gridlock due to pedestrians clogging the streets.
 The reason for the walkway is that the Oriental Pearl Tower (not as new as the rest of PuDong) is right there. The walkway can be accessed via escalators. I think there is also an elevator but I am not sure.
 We were in the middle of the financial district. These 3 building - the one on the right is still under construction - represent the tallest buildings in the area. There are two towers in the center. One is silhouetted against the other.
 A view of the Oriental Pearl Tower from the walkway.
 Here is the traffic circle with the walkway and the base of the tower. There is a lot of green space in PuDong. The streets are wider than in PuXi and there is less traffic congestion. The buildings in the background are in PuXi so there are also tall, modern buildings there in addition to the historical areas.
 We are currently in the year of the dragon per the Chinese calendar so there is a dragon near the traffic circle. Lots of flowers as you can see.
 The walkway is always full of people. It is definitely nice to be able to stand and browse without having to worry about the cars.
 Another view of the walkway and an interesting triangular building in the background. The architecture in PuDong is very eclectic. All sorts of interesting shapes.
 PuDong at night. Everything is lit up at night. You can see the two buildings in the center more clearly at night.
I took this photo at night. It looks across the river at a building that looks as if it has a flower on top of it. The flower effect is more pronounced at night. The reason this is so bright is because this area has a lot of street lights due to it being a pedestrian area. Right behind the car is an area by the river where one can walk or stroll.

This is not a representative view of Shanghai. There are a lot of more crowded areas and definitely this area is very prosperous and spacious. But it was nice to spend time there and it was not what I expected, so I thought I would share.

Sunday, November 11, 2012

For the want of a stopper

Today was a gorgeous day. I thought I would take advantage of it and finish preparing the two fleeces I had. One was from May and the other from August. The May one was washed but that was it. The August one needed to be washed.
 This fiber was from a Montadale/Corriedale cross so I had high hopes for it. I was not disappointed. The locks were well defined and there was little or no vegetable matter or other junk in it. The ends are slightly sunburned which will add some depth to the color of the yarn.
 I decided to wash them in these seed starting trays I bought for fleece washing. I wanted to keep the locks intact so I could comb or spin from the locks. Here they are, nicely lined up like soldiers on a tray. I have 8 trays, I think.

 I kept two trays empty to act as weights when soaking and draining the filled tray.  I thought I would put the trays in the foil trays I used to wash the last fleece. I would use the empty tray to push down the filled one into the water and then again to squeeze the water out of the locks.
 The trays stack up nicely. You can see the color variation in the locks in this picture. This set is more grey than some of the others.
I wasn't able to fit all the locks into trays. This is the amount that is left.

Unfortunately, the seed starting trays are too big for the foil pans. So I decided to use the laundry tub, but we don't have any stoppers for the drain. Or at least we do, but it is cracked and useless. I went out to the hardware store to get a replacement but they didn't have any that size. So that was the end of the fleece washing plan.

However, I had the washed fleece to work on. I began with this
and ended with this.
And this is where I spent the day. No complaints here. I feel a sense of accomplishment and I think I can wash the fleece tray by tray over the next week or so. Once I get a stopper of course!